Build your own sauna with a sloping roof - suggestions/notes/plans

  • Erstellt am 2020-11-24 10:14:29

matte

2020-11-27 14:59:31
  • #1
Yes, it is intended to be with brackets.
 

matte

2020-12-02 08:45:47
  • #2
The planning phase is coming to an end. ;)
After I bought a miter saw over the weekend, I went to Hornbach and Bauhaus yesterday. I bought everything for the ventilation, which also implies the silicone lines that I have to lay in advance because I won’t be able to access the high-voltage connection later.
The exhaust air also has to be installed right away, as it leads upwards at the back wall and then forwards above the sauna. I have now decided to install an inline fan that is controlled via the sauna control panel. This should ensure sufficient ventilation after using the sauna.

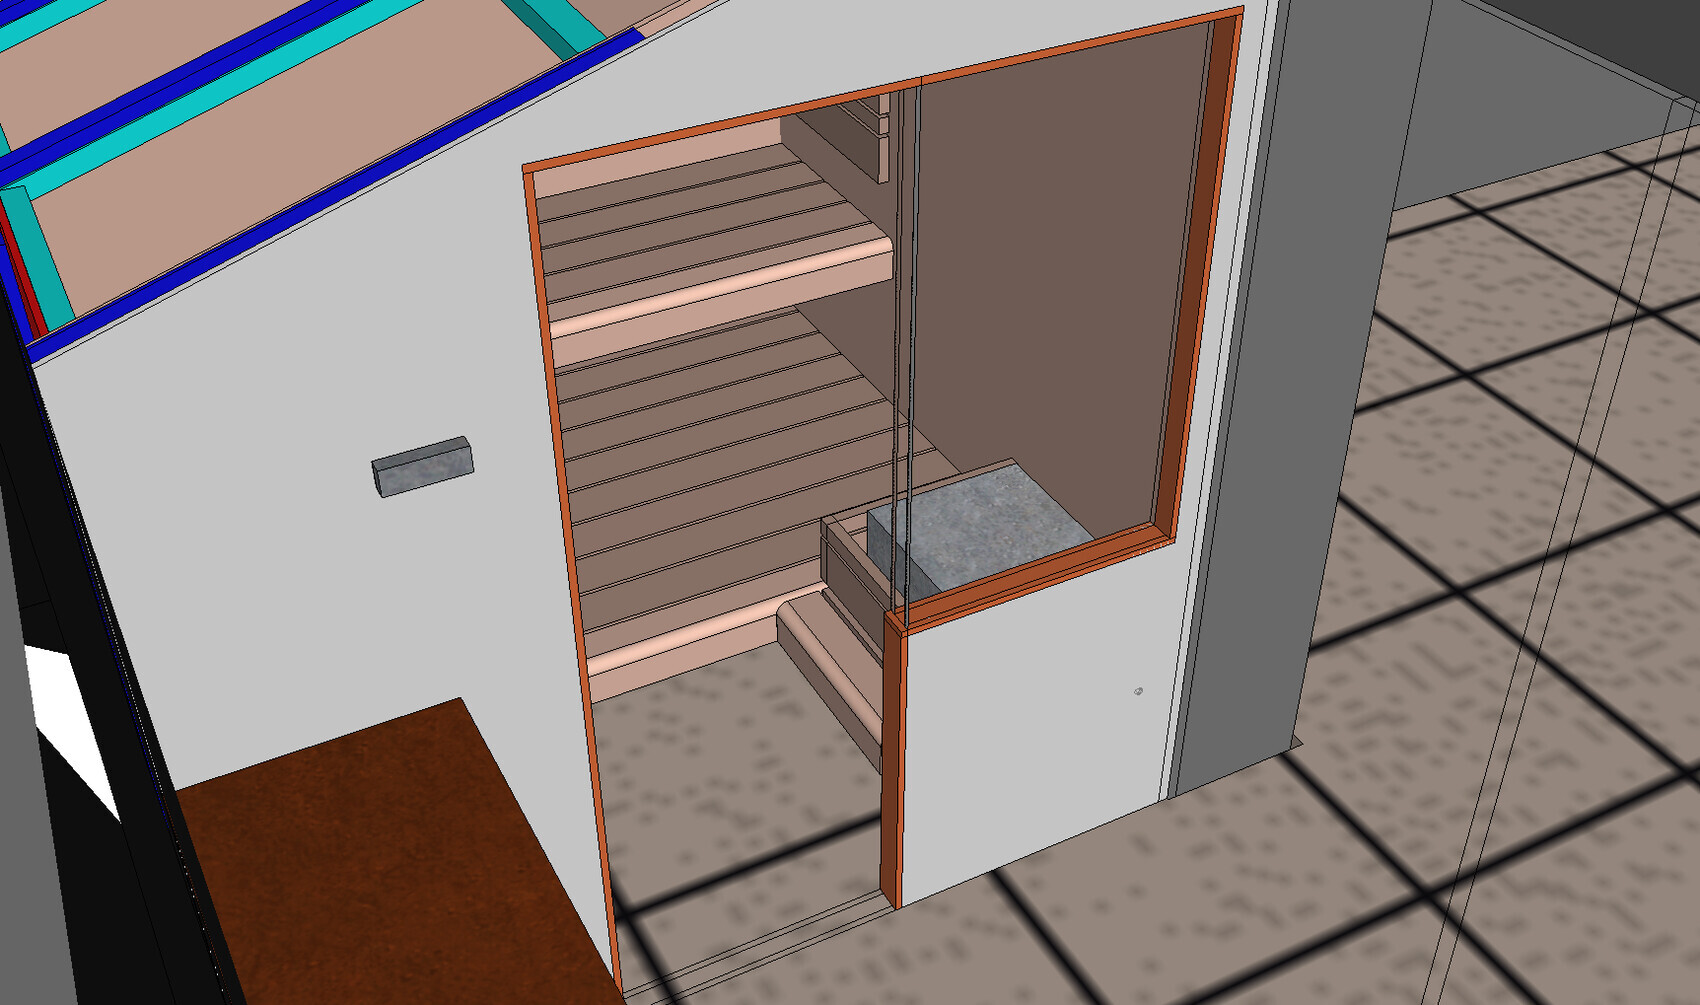
Regarding the arrangement of the benches, we have now decided to do the upper bench at the same time, but the lower one runs underneath.

I struggled for a long time with the lighting, whether to simply try the Philips Hue strips that I still have at home, but that feels too uncertain to me.
I am now strongly leaning towards the lighting solution from Sentiotec, which offers RGBW tubes and ceiling spots that can be controlled with a single remote control. These also offer different modes for color gradients, etc.
Anyway, I want to go all in now :D
2x Tube 1.80m: Behind the backrest of the upper bench and under the upper bench.
1x Tube 0.50m: Under the lower bench
1x RGBW round spot: Directly above the sauna stove.

After consulting with support, I was advised to lay the cables to the driver above the sauna in empty conduits. Now the only question left is which empty conduit I should use and where I should install it? In the ventilation layer or in the insulation layer?

Regarding the whole ventilation and rear ventilation issue, I spoke again with my colleague who is now a sworn expert in ventilation technology. So he’s not completely unfamiliar with the subject ;)
He built a sauna in his basement 10 years ago and at that time decided to build small openings ~5x1cm at the bottom from the inside sauna wall to the rear ventilation. This should enable better flow through the rear ventilation; he would do it the same way again, even though he has not seen it anywhere else. So I will probably plan it that way now as well.

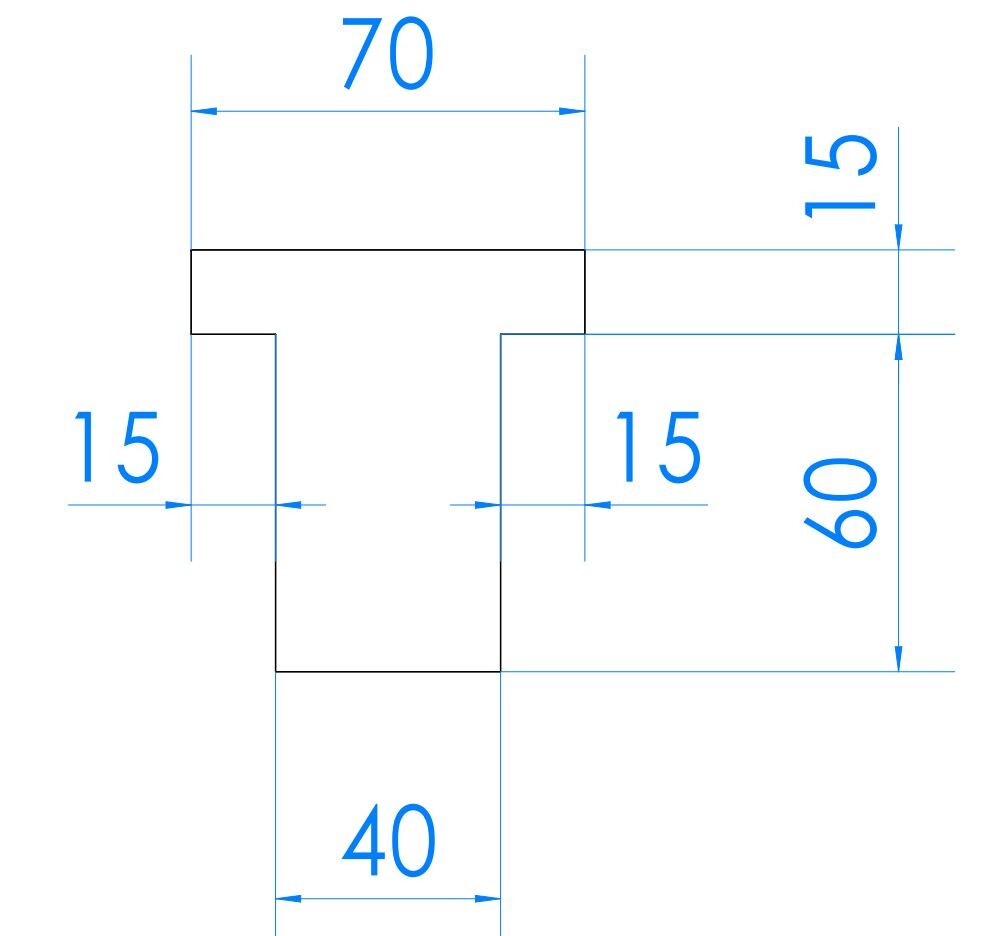
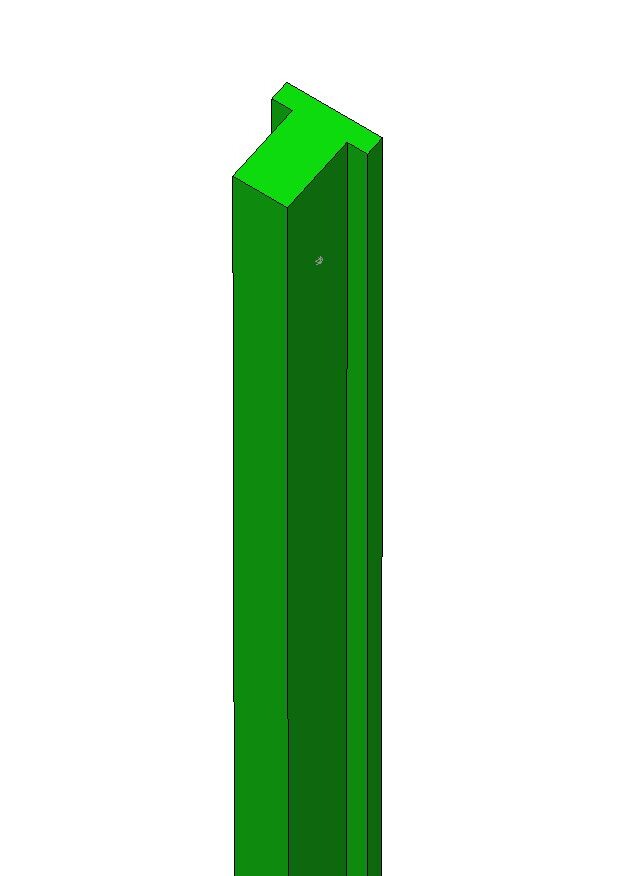
Regarding the mounting of the jamb boards, a request is currently running with the timber dealer to see if he can mill the 60x40 timber beam together with the jamb board out of one piece of wood. That way I wouldn’t even have to install the board, and I could build the door/window frame exactly from one piece.

Today we want to clear out the room, then theoretically we can start. The well-known glazier won’t be available until the new year anyway, but I will definitely need the time. My wife’s wish to inaugurate the sauna on New Year’s Eve was unrealistic anyway... :D


matte

2020-12-03 14:06:46
  • #3
Here is the final plan status, tonight I will order the bench slats.
We have now changed our minds again and will not let the lower bench run all the way to the back. You can't really get your feet under there anyway.
The paneling is set back so that the width of the lower bench is more comfortable. In addition, I can then move the exhaust vent in the sauna further back into the corner behind the paneling, so that it is diagonally positioned from the stove.
This gives the lower bench a lying depth of almost 80cm, with about 60cm available on top.
Can any of the sauna owners do me a favor and measure the height of the backrest when convenient? That is, from the top edge of the seat bench to the middle of the backrest. That would really help me, currently I have it set at 40cm.


Nida35a

2020-12-03 14:55:17
  • #4
Bottom edge of the backrest 27cm, top edge of the backrest 57cm, seat height 110cm, lying width 60cm, lying length 195cm and 200cm at the corner, sauna height 210cm outside, 200cm inside, air gap under glass door 1.5cm, fixed glass pane stands in a silicone profile, door hits another silicone profile
 

matte

2020-12-08 08:37:31
  • #5
Brief interim report: After I started on Saturday, the sobering reality quickly set in. The company PC, on which I created the plan, was not accessible. So I could only use Saturday to set up a bit and cut the roof battens into 30cm pieces. Sunday then made some progress, and yesterday I temporarily mounted the first OSB boards. They have to be removed again to lay the empty conduits. Unfortunately, I had a transposition error and confused the depth of the roof battens for ventilation (24mm) with the depth of the bench battens (28mm). So I ordered ELT empty conduits with 26mm, which apparently do not fit into the ventilation layer... They will be delivered tomorrow, then I'll try if they can be squeezed in a bit. Otherwise, unfortunately, they have to be returned and I have to order a size smaller. It's just annoying because I need an empty conduit for the control unit where an RJ10 plug has to fit through. That will be tricky. On Sunday, I also determined the quantities for the KVH and the substructure of the benches; yesterday the order was sent to the timber dealer. I have nearly 3 weeks off, so I hope it will be there by then. It should work, he specified a delivery time of about 1 week. I ordered bench battens and a few other things last Friday from Saunainter in Estonia; this is a bit urgent only insofar as the control is included, which I want to mount above the sauna soon because access will be somewhat restricted later. Theoretically, it will still be fine in the new year; that has to happen before the insulation anyway. What annoys me the most is the inaccuracy of our plasterer. The rear wall, where the exhaust goes upward, is significantly crooked. At about 2m height, there's about a 1cm difference. Actually, no wall is really straight. :rolleyes: I don't yet know whether I'll completely compensate for this with the KVH or simply accept the differences. Slow but steady wins the race ;)
 

11ant

2020-12-08 13:38:27
  • #6

That's exactly what I always tell people here, who dream that their house would be built by precision mechanics, fitting perfectly around their wardrobe :-)
 

Similar topics
03.05.2015Building a Sauna - Many Questions13
02.06.2016Conduit Costs - Network, SAT, Backup14
10.06.2016Banish sauna from the bathroom17
01.03.2017Controlled residential ventilation and extractor hood exhaust10
03.10.2016Exhaust air and supply air one above the other?22
27.01.2017Exhaust air vs. recirculated air in a controlled residential ventilation system32
13.02.2017Number of supply and exhaust airflows in residential ventilation11
05.05.2017Central Controlled Residential Ventilation: Supply and Exhaust Air, Door Bottom Gap30
24.05.2024Planning empty conduits for satellite system and photovoltaic system14
21.08.2017Sauna in the garden11
09.01.2018Exhaust air in the bedroom - supply air in the storage room24
23.07.2020Empty conduits on the property - ideas? - It's not too late yet :)103
29.07.2019Sauna with boundary construction19
09.09.2019Are empty conduits and empty boxes in WU concrete dangerous?10
07.11.2019Single-family house 172 sqm with garage and sauna54
14.02.2021Empty conduits from the house to the garden / Tips10
15.03.2021Sauna in the garden in Bavaria - distance to neighboring property29
19.01.2022Tips for sauna in the basement & tips for gym in the basement16
04.07.2022Conduits for SAT and TK, mandatory or not in new construction?13
25.11.2023Sauna in the main bathroom or in the basement?34

Oben