Gardena Smart Sileno Life 750 - Mowing Area Division

  • Erstellt am 2021-12-16 13:20:05

NOmex

2021-12-17 11:44:57
  • #1
Do you mean the installation like this... Should the control cable also reach into area 3 or are areas 1 & 2 sufficient?
 

Nida35a

2021-12-17 12:02:46
  • #2
Guide wire and boundary wire as shown. 2 and 3 is the transition so wide, he finds it on his own, through the 1m gate he would rarely find it on his own without the guide wire. I slit the pavement with a flex grinder, about 1cm deep, and pressed the cable in with a blunt screwdriver, alternatively lift, put the cable under, lay it again
 

NOmex

2021-12-17 12:16:45
  • #3
The plaster is 8cm high. Will he still recognize the signal if I place it underneath? Otherwise, maybe in the joints...
 

Nida35a

2021-12-17 13:38:04
  • #4
Our pavement is also 8cm high, the outer stones are made of concrete, I didn’t want to remove those because they are super solid. Of course, I cut in the joints where possible, simply straight through, our pattern was suitable for that. I will add a picture later.
 

Nida35a

2021-12-17 14:42:21
  • #5
a wide shot and one directly of the joint


NOmex

2022-01-30 14:49:07
  • #6
Hello everyone.

I have now started with the detailed planning. Attached you will find pictures of our garden along with my considerations for laying the boundary wire. I would like to hear your opinion on whether this will work and what you would do differently.

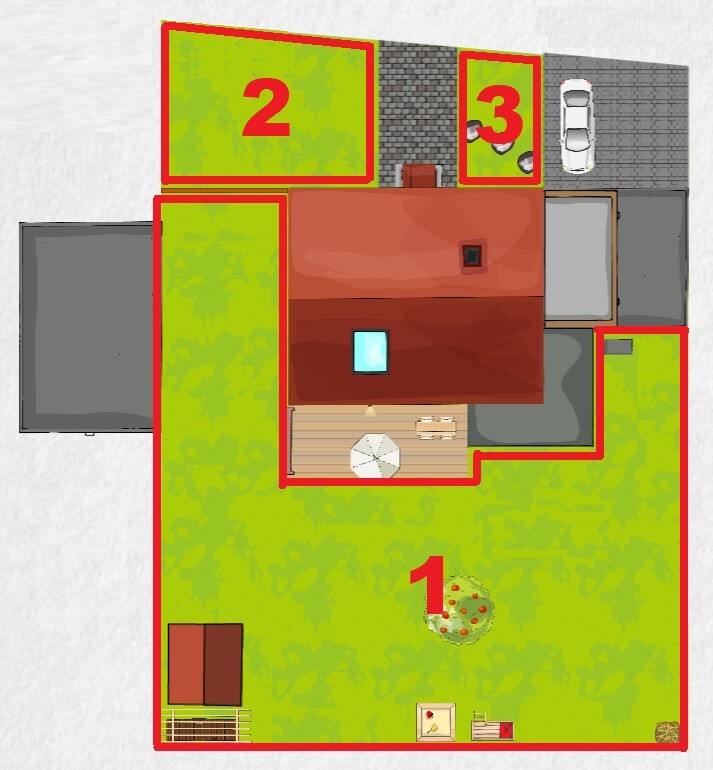
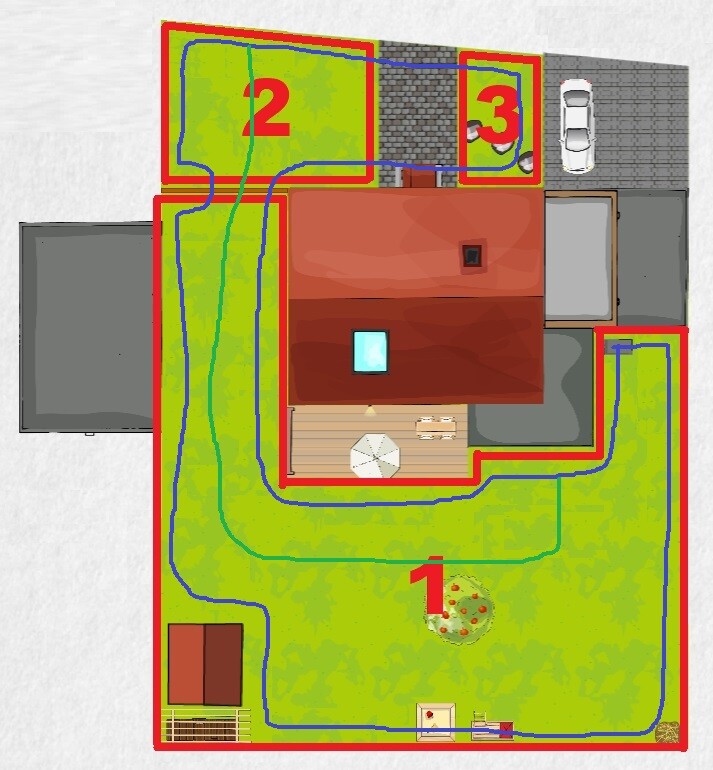
Garden plan (1. Main garden; 2. Mowing area separated by garden gate, which can be opened as needed; 3. Separated garden area)
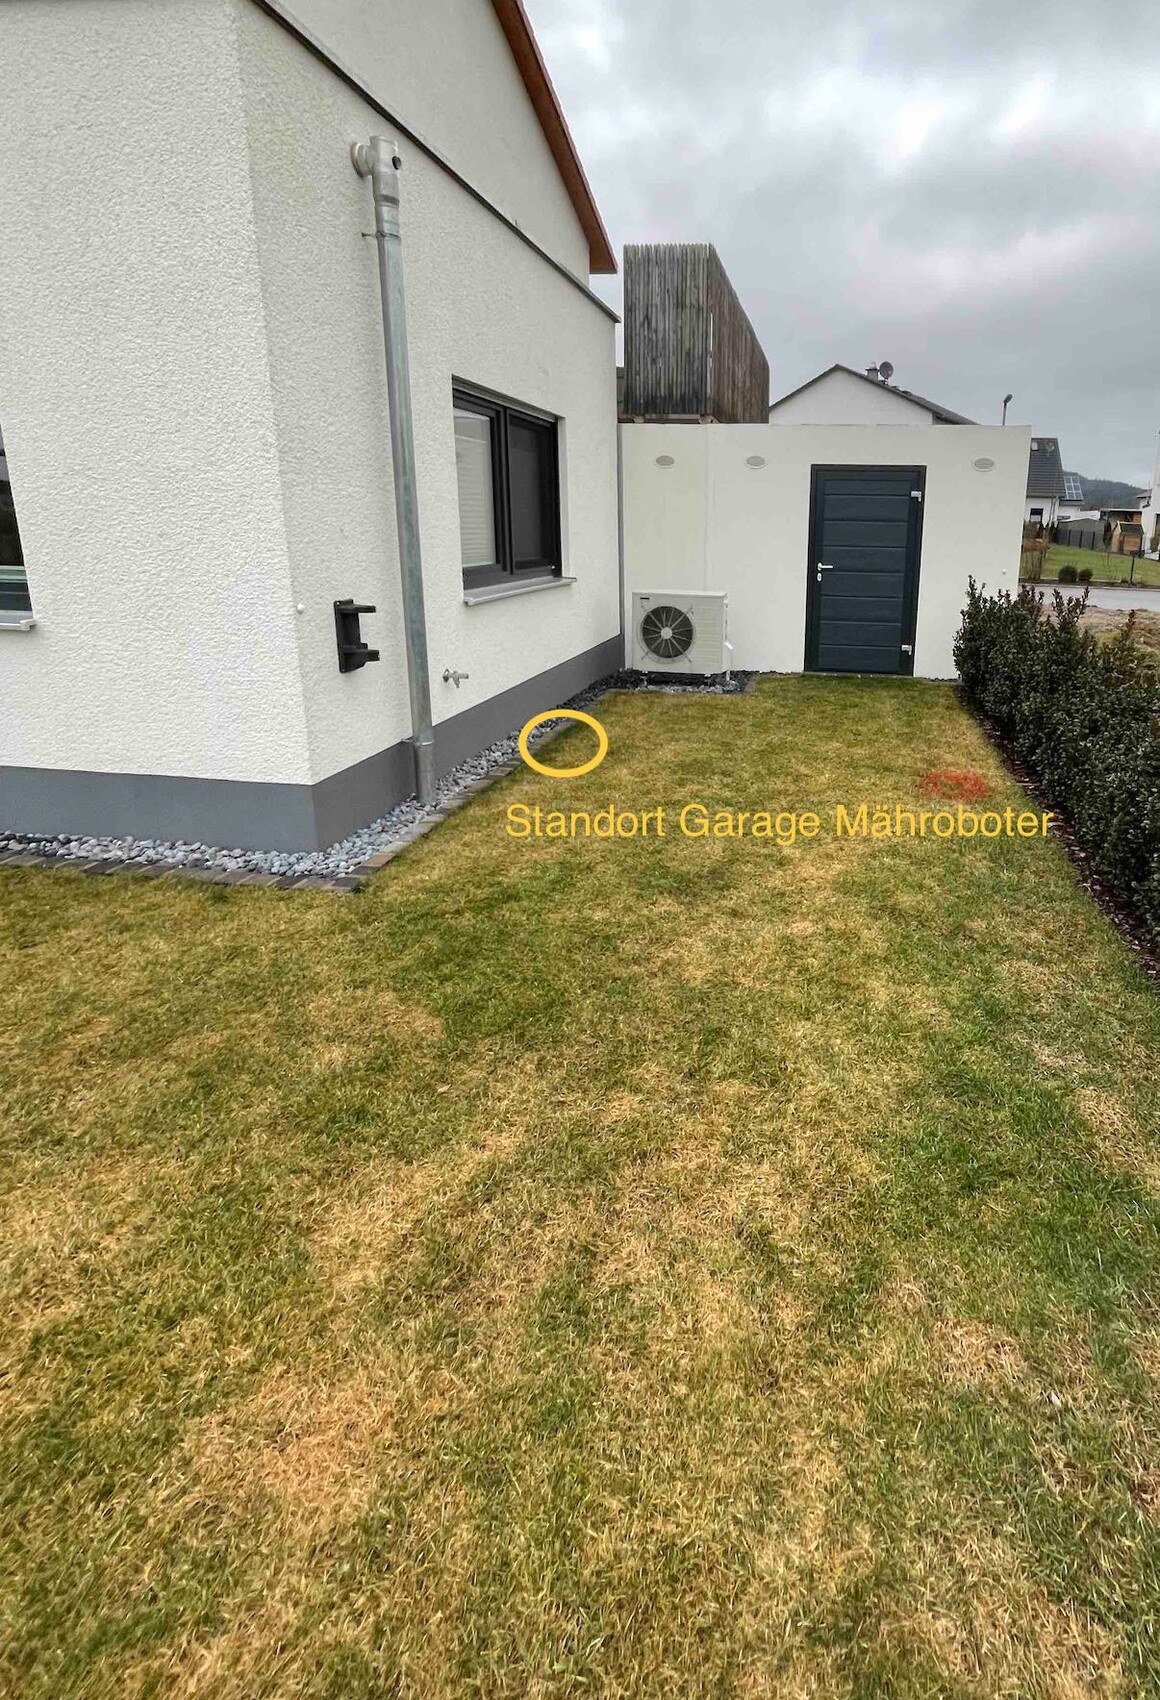
1. Location garage lawn mower robot
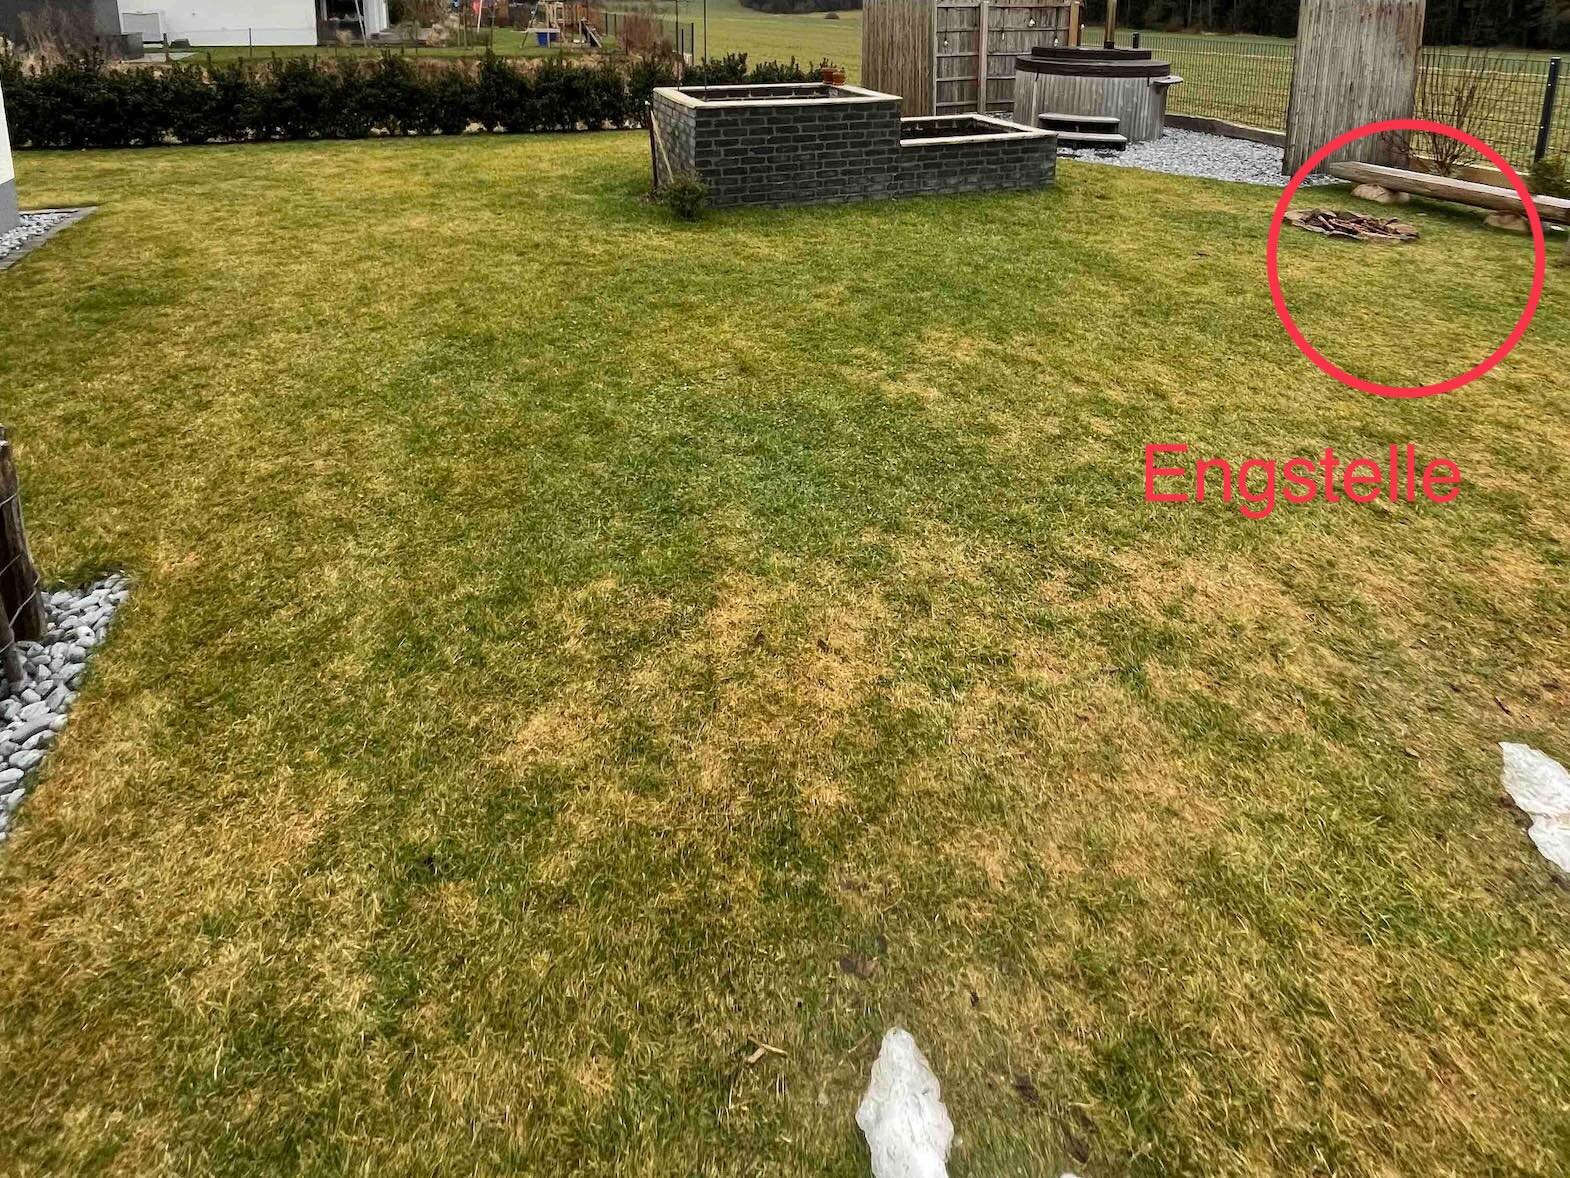
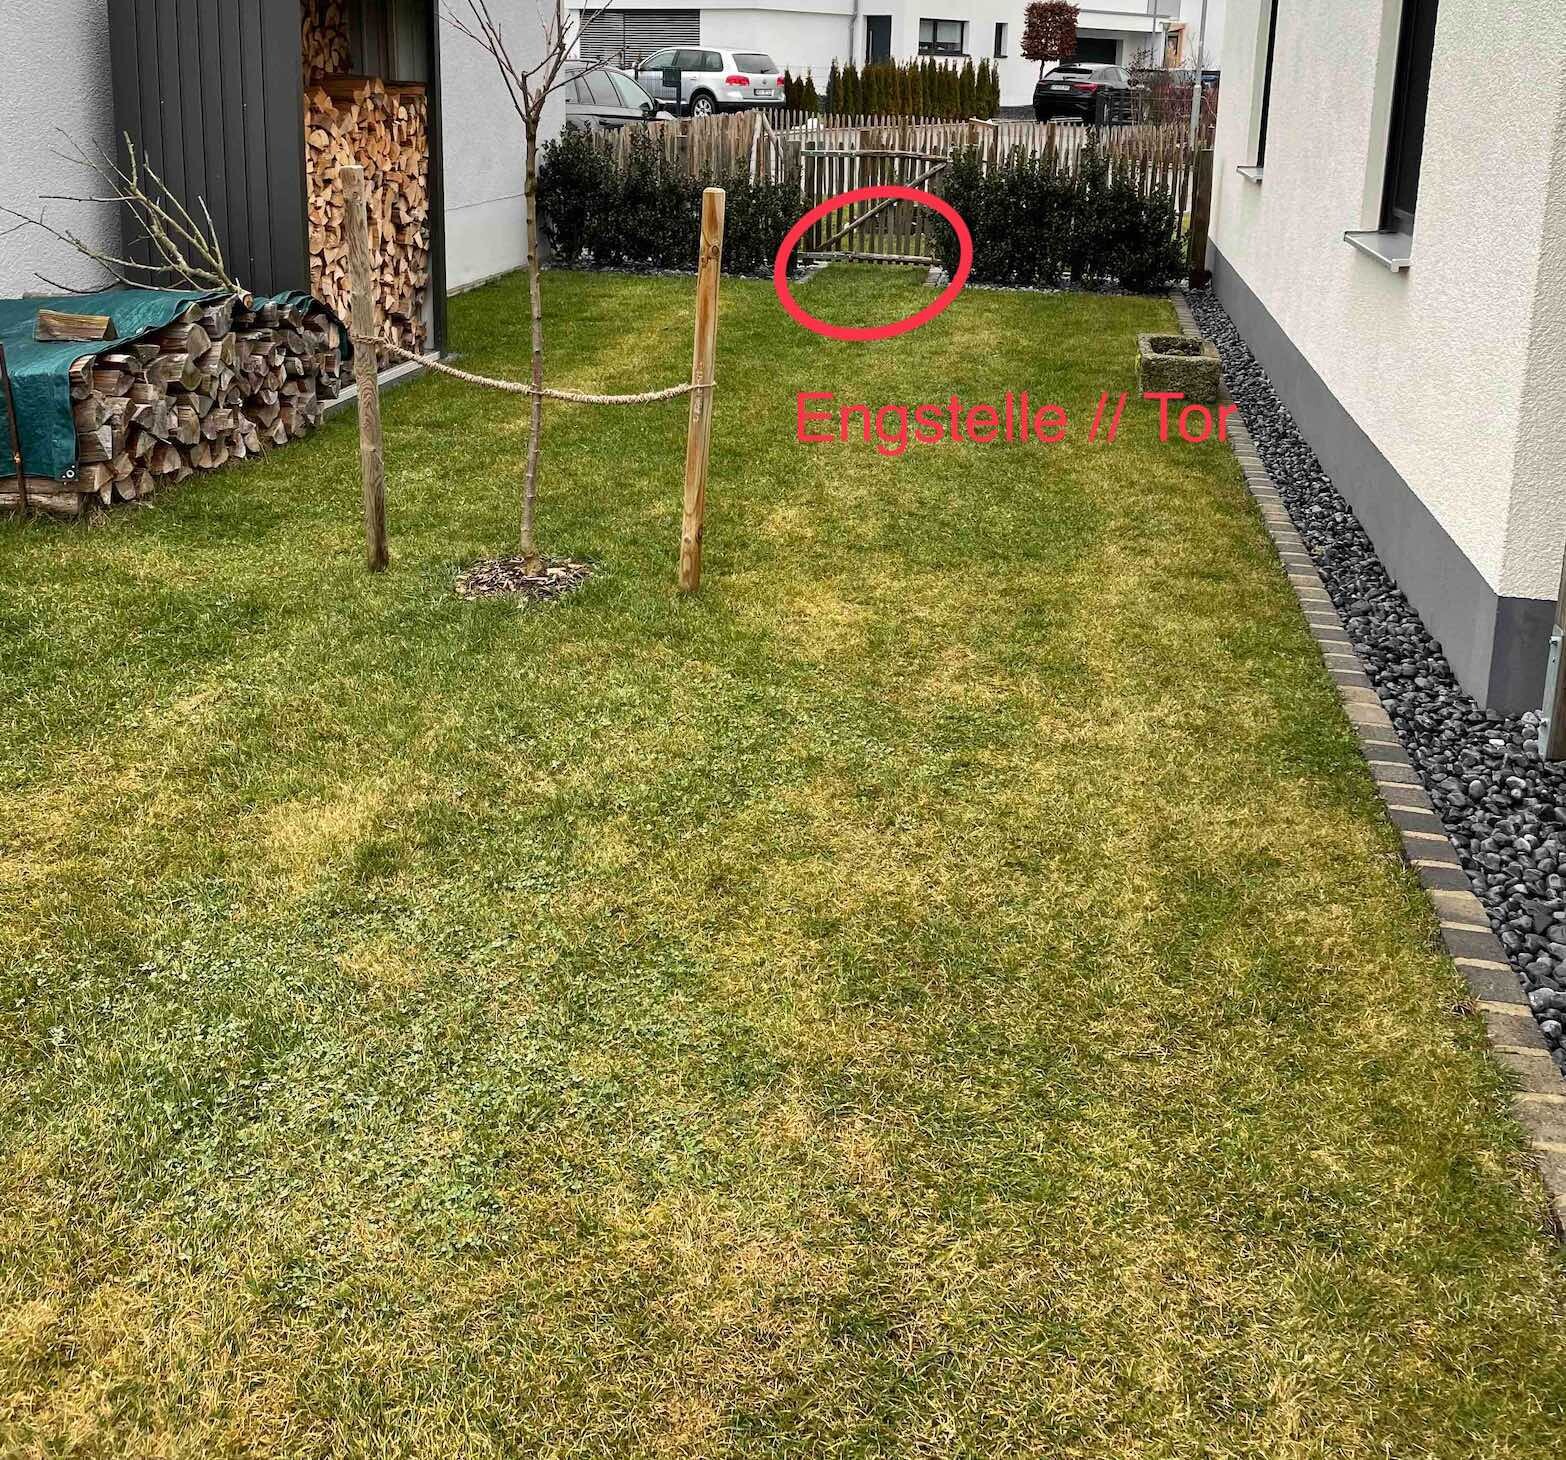
2. Marked narrow spot (bench) I could rebuild so that the robot can drive through.
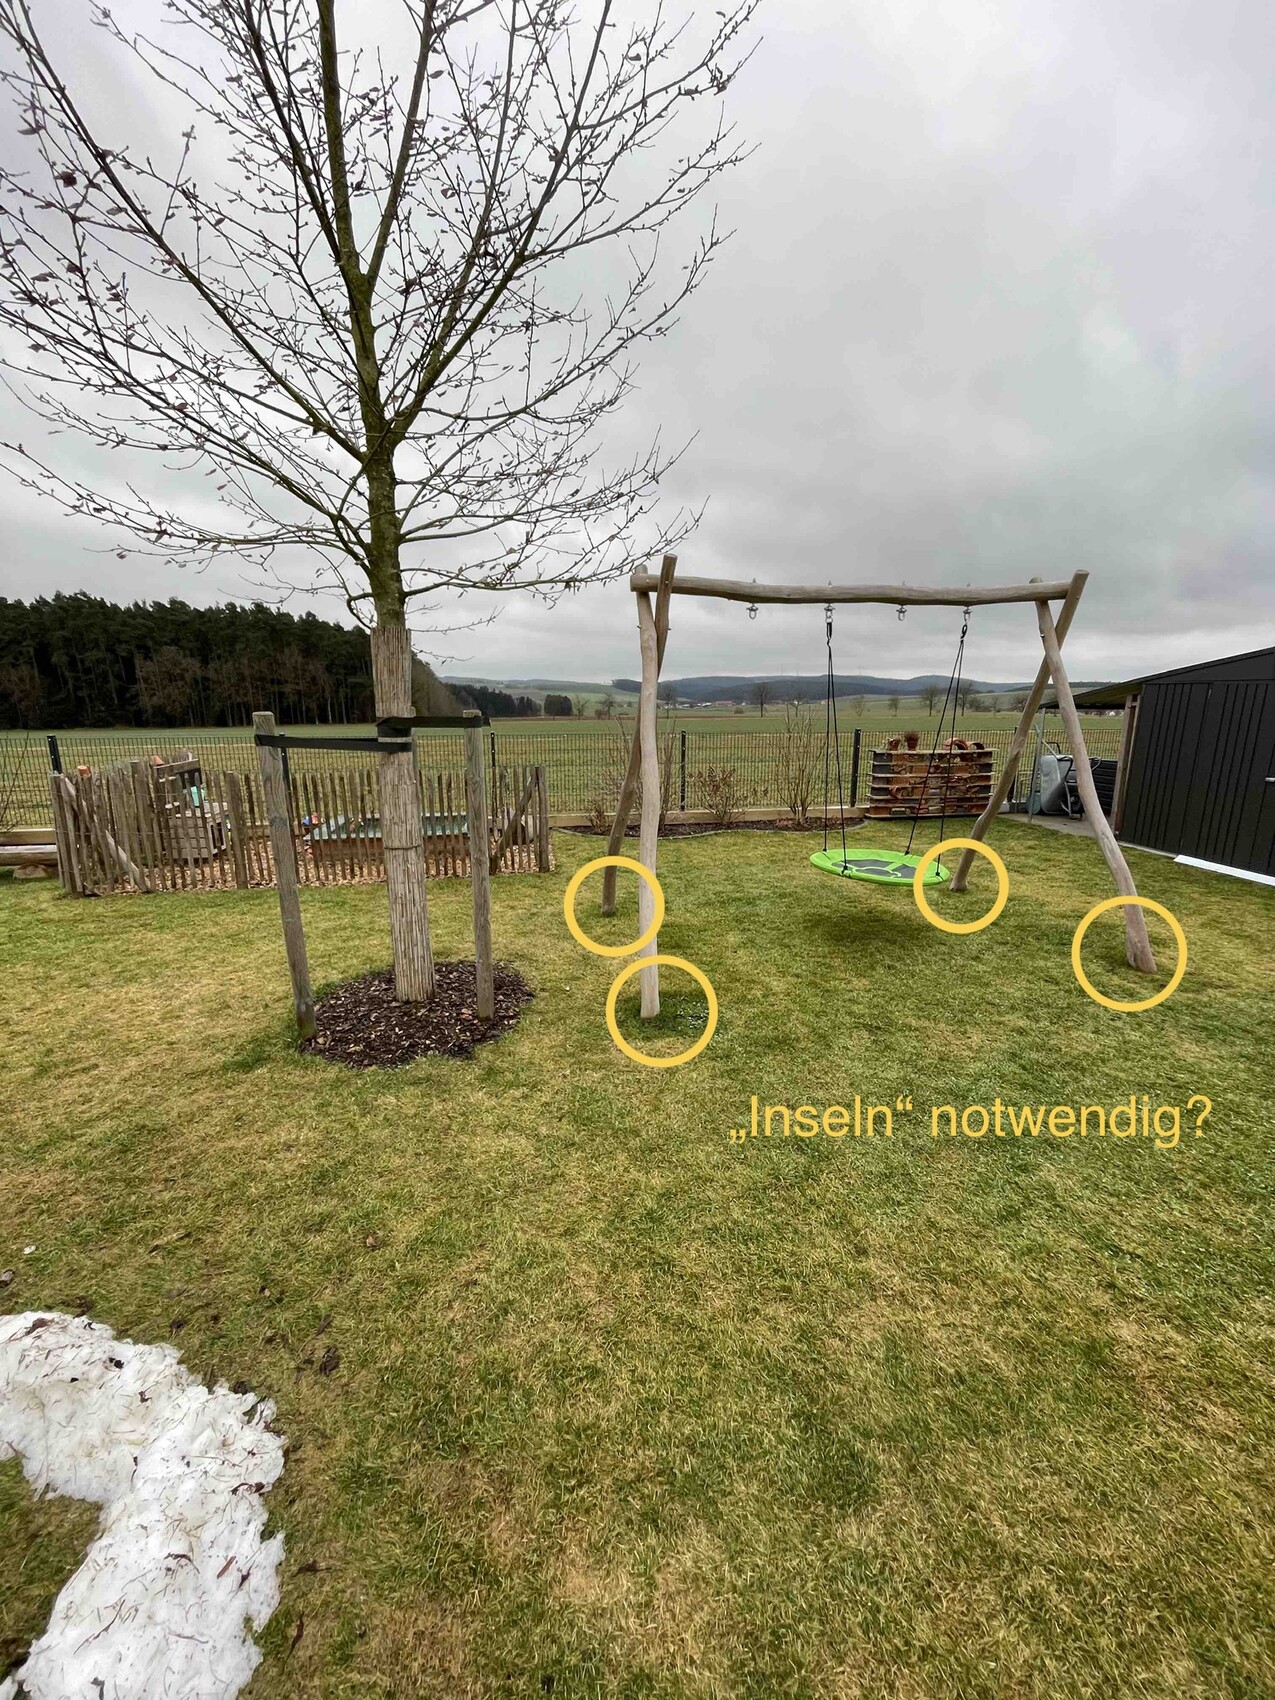
3. Do I need to create individual "islands" for the posts or is this sufficient for the tree?
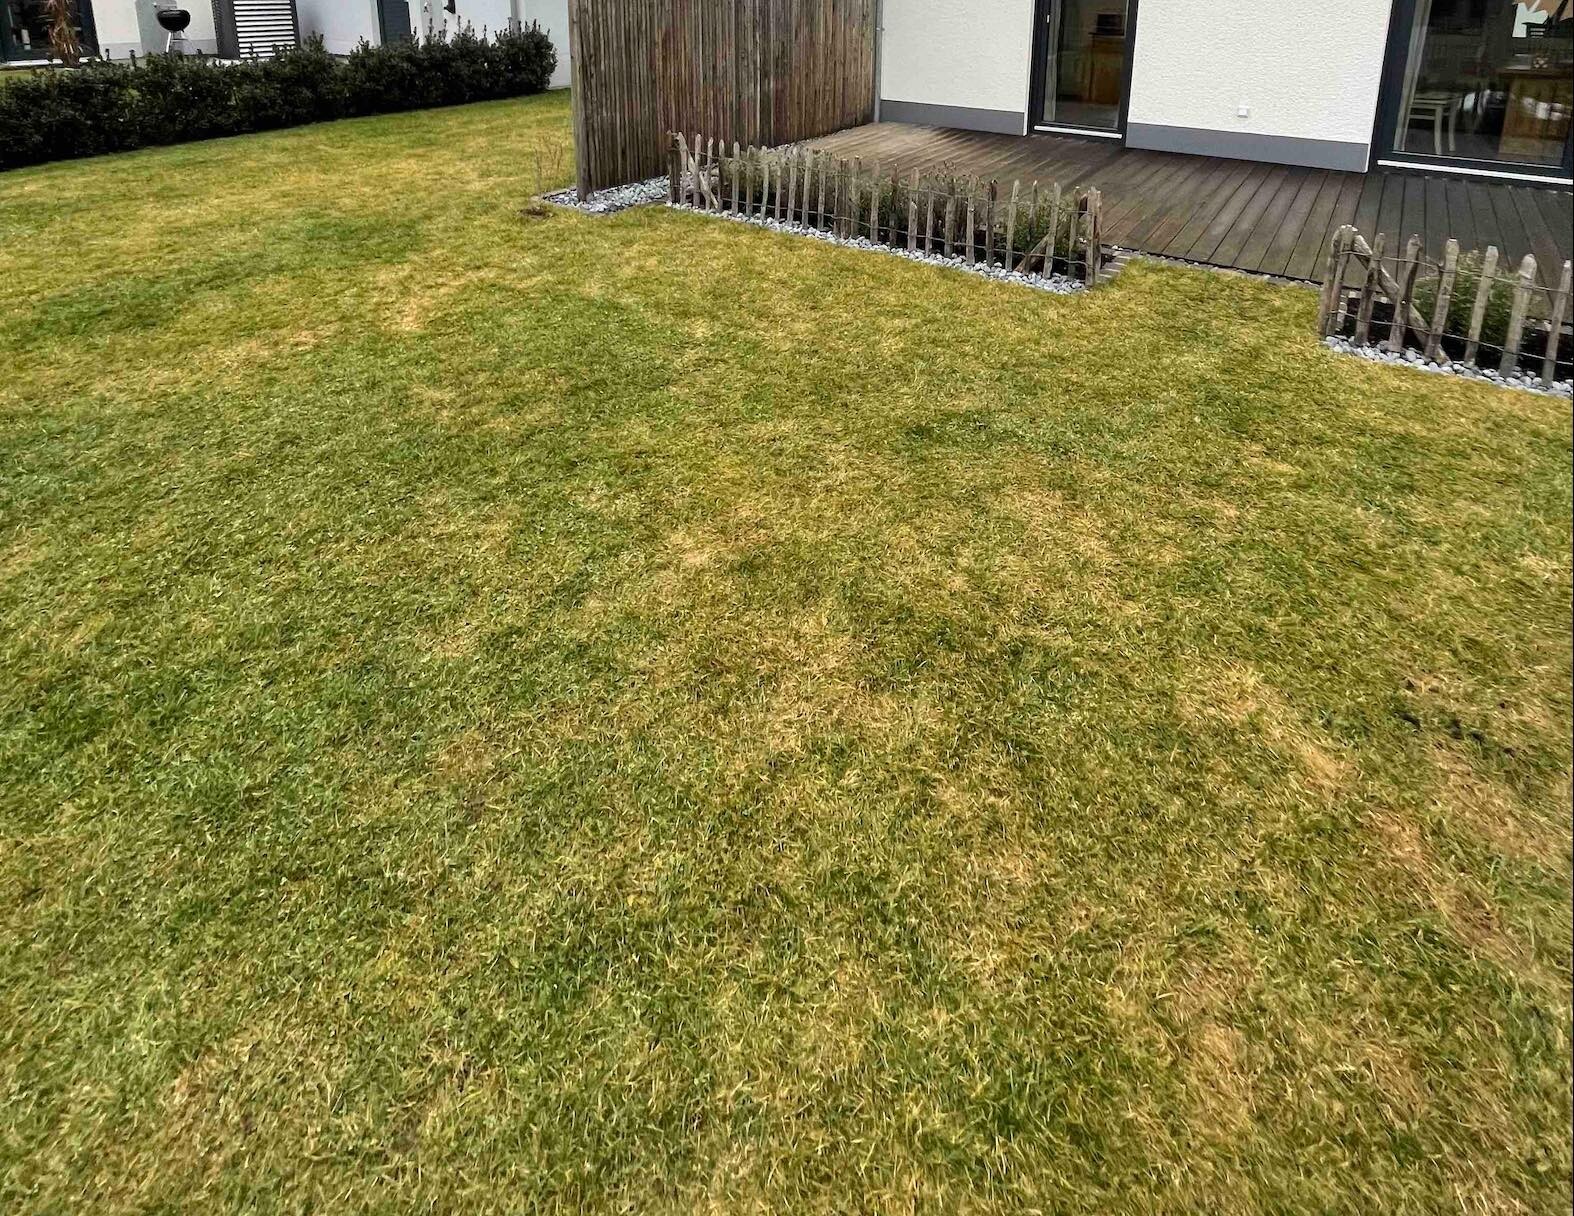
4. View of main garden
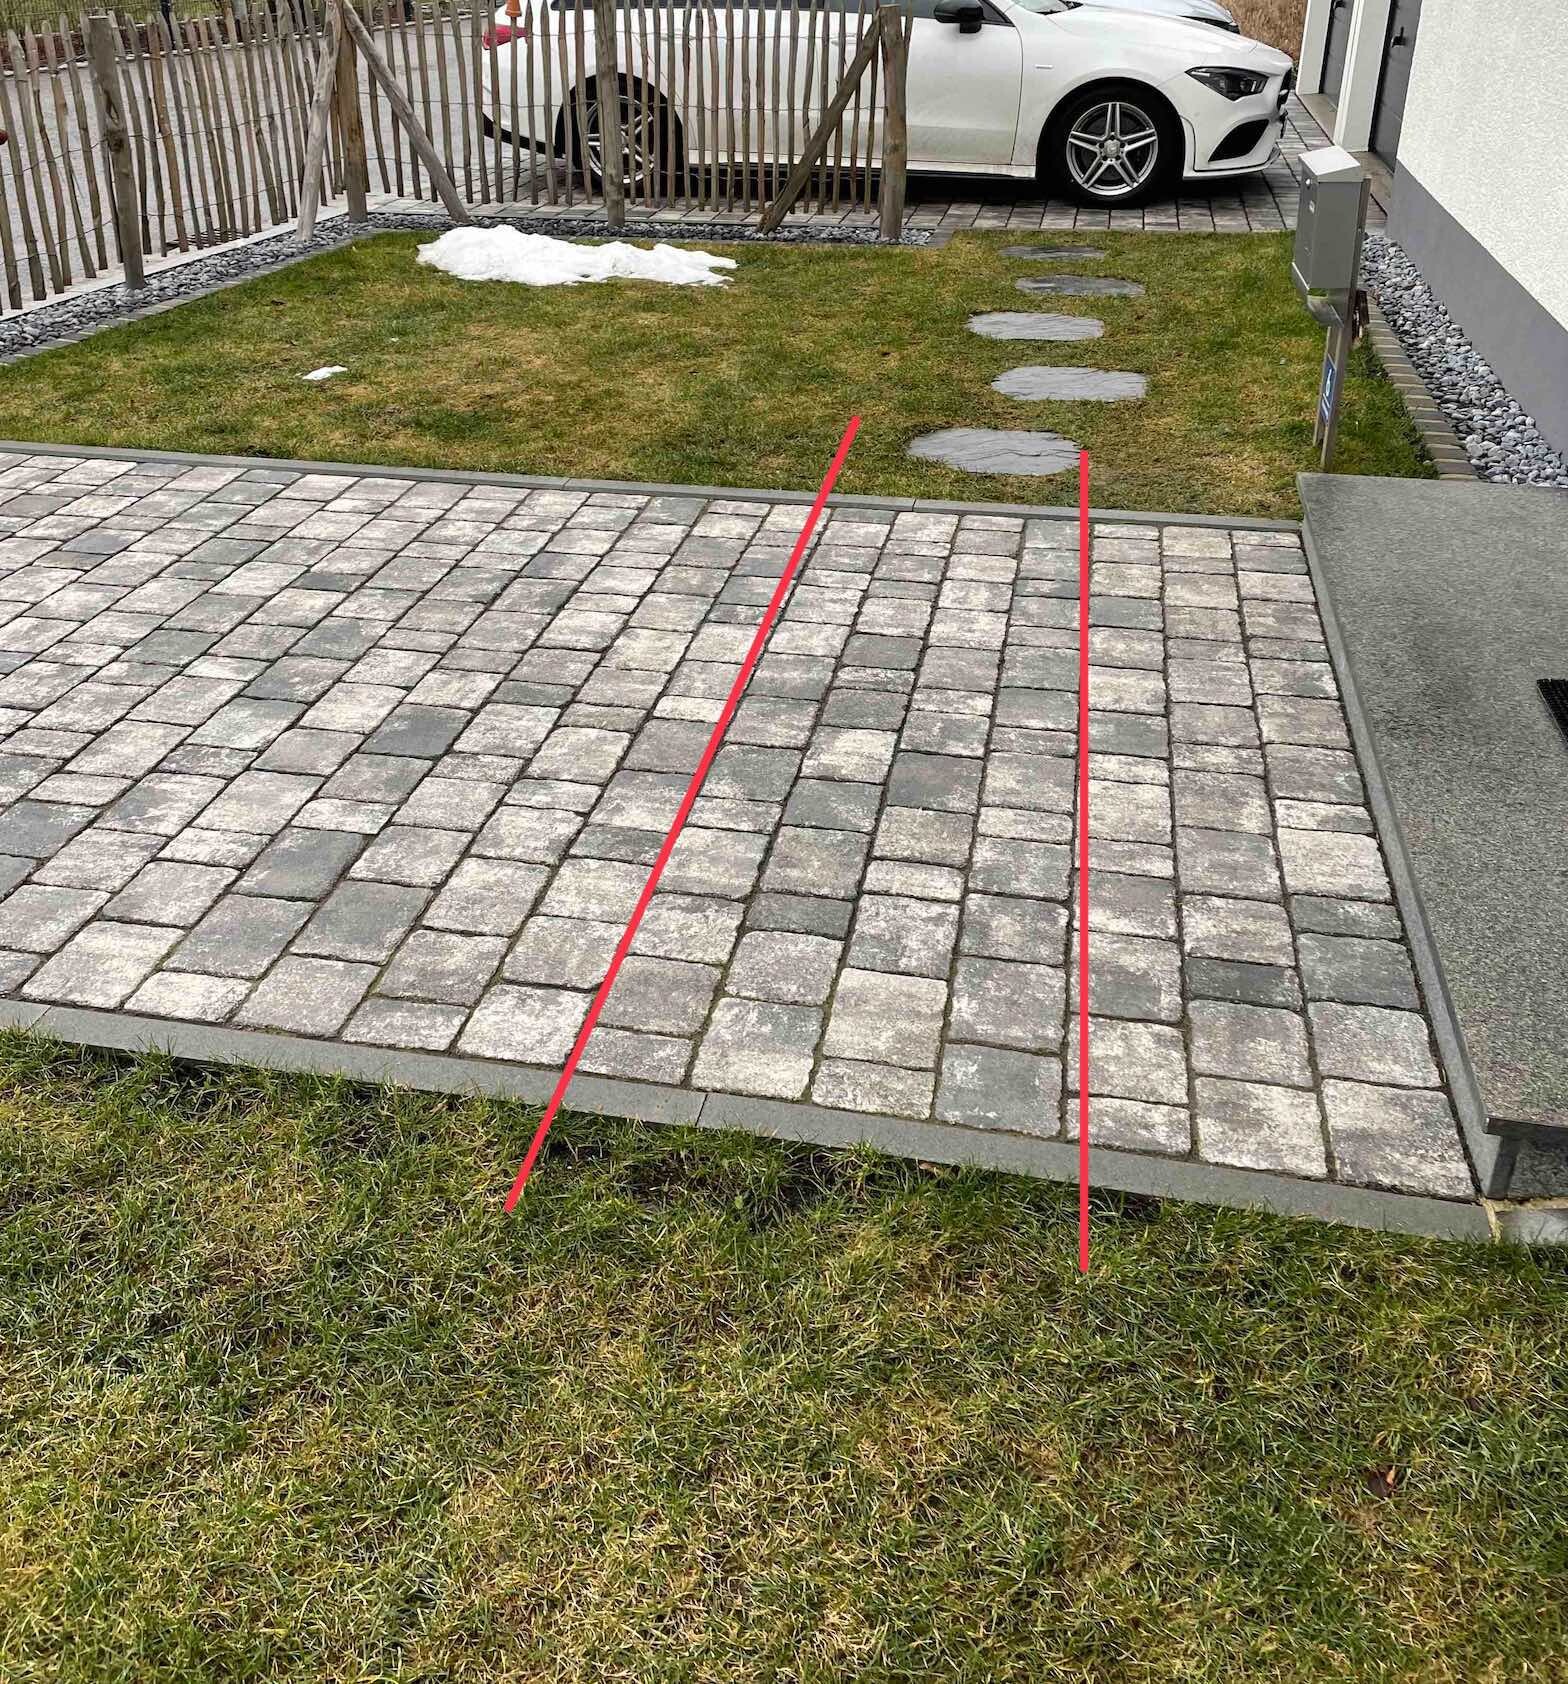
5. Narrow spot (1.00 m) - I would leave the gate open as needed (e.g. 1-2 times a week) so that the robot mows the front area.
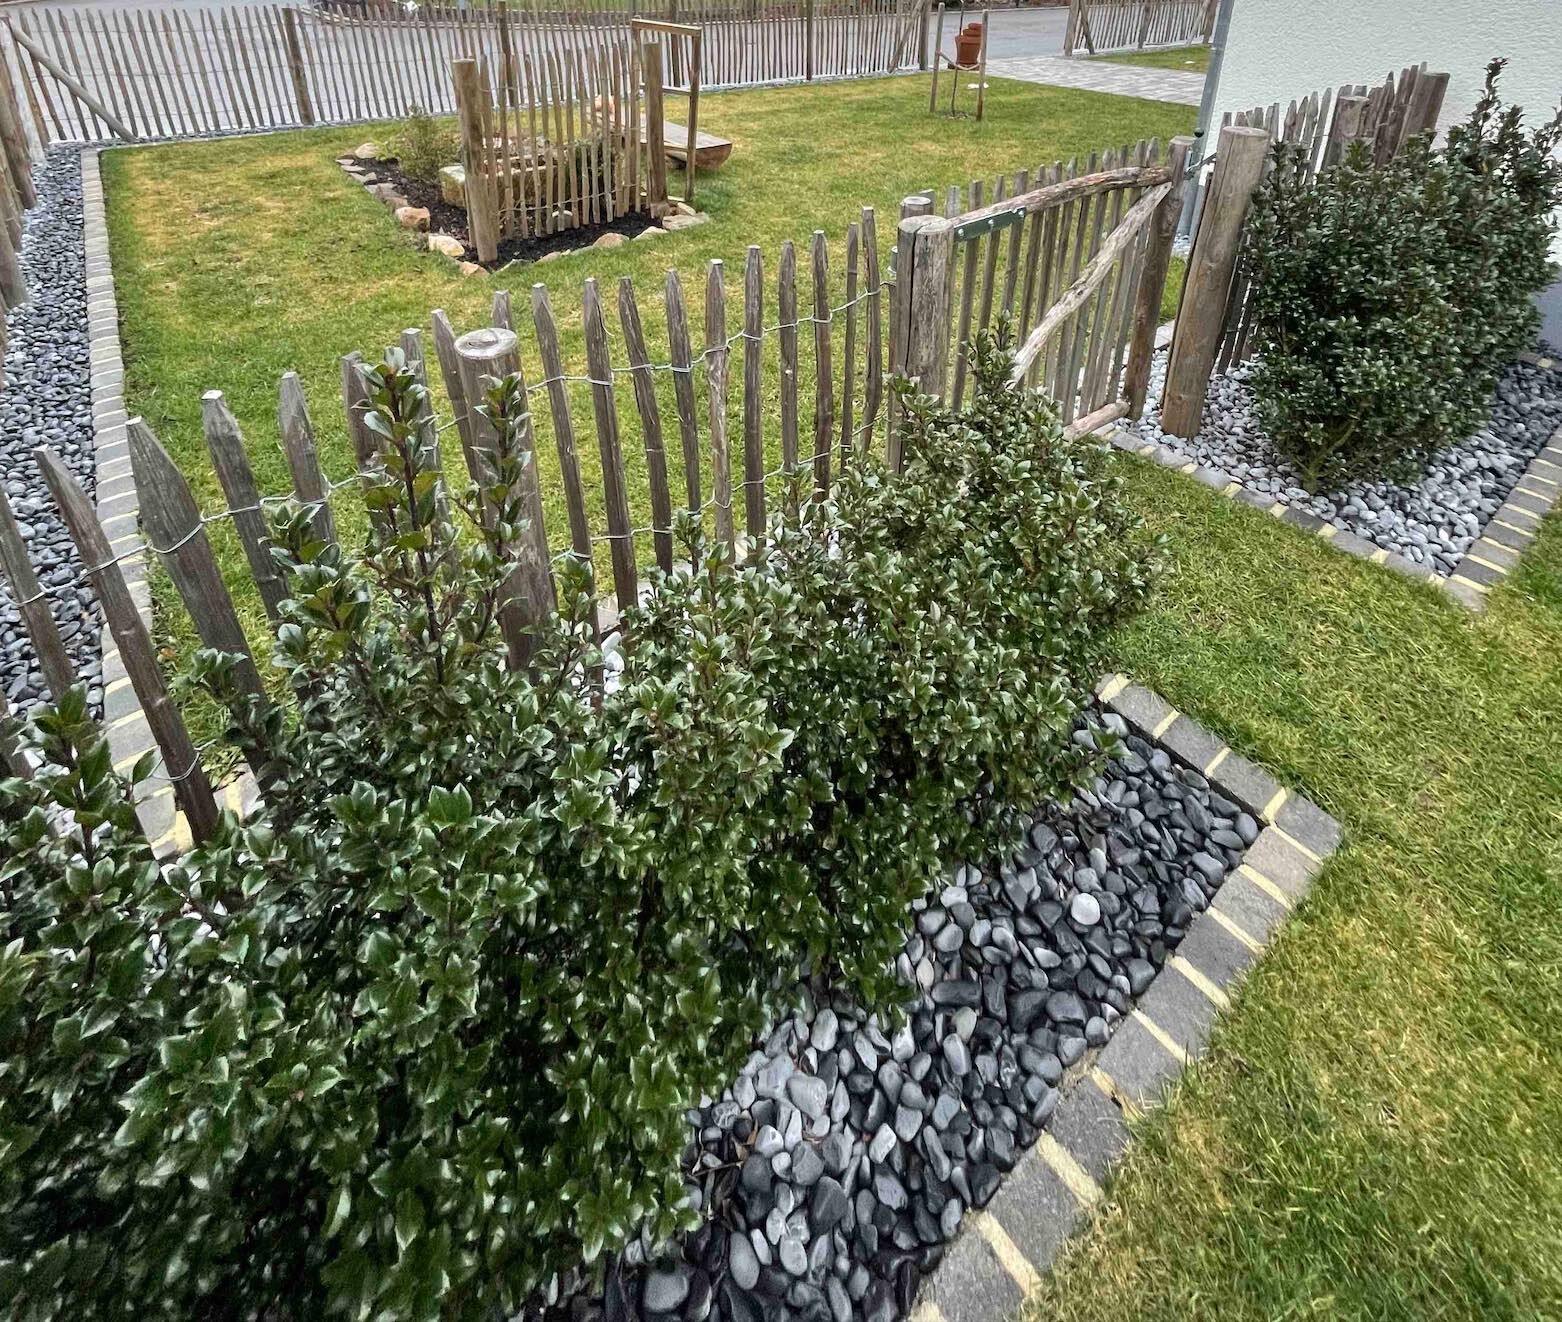
6. Detailed view narrow spot/gate
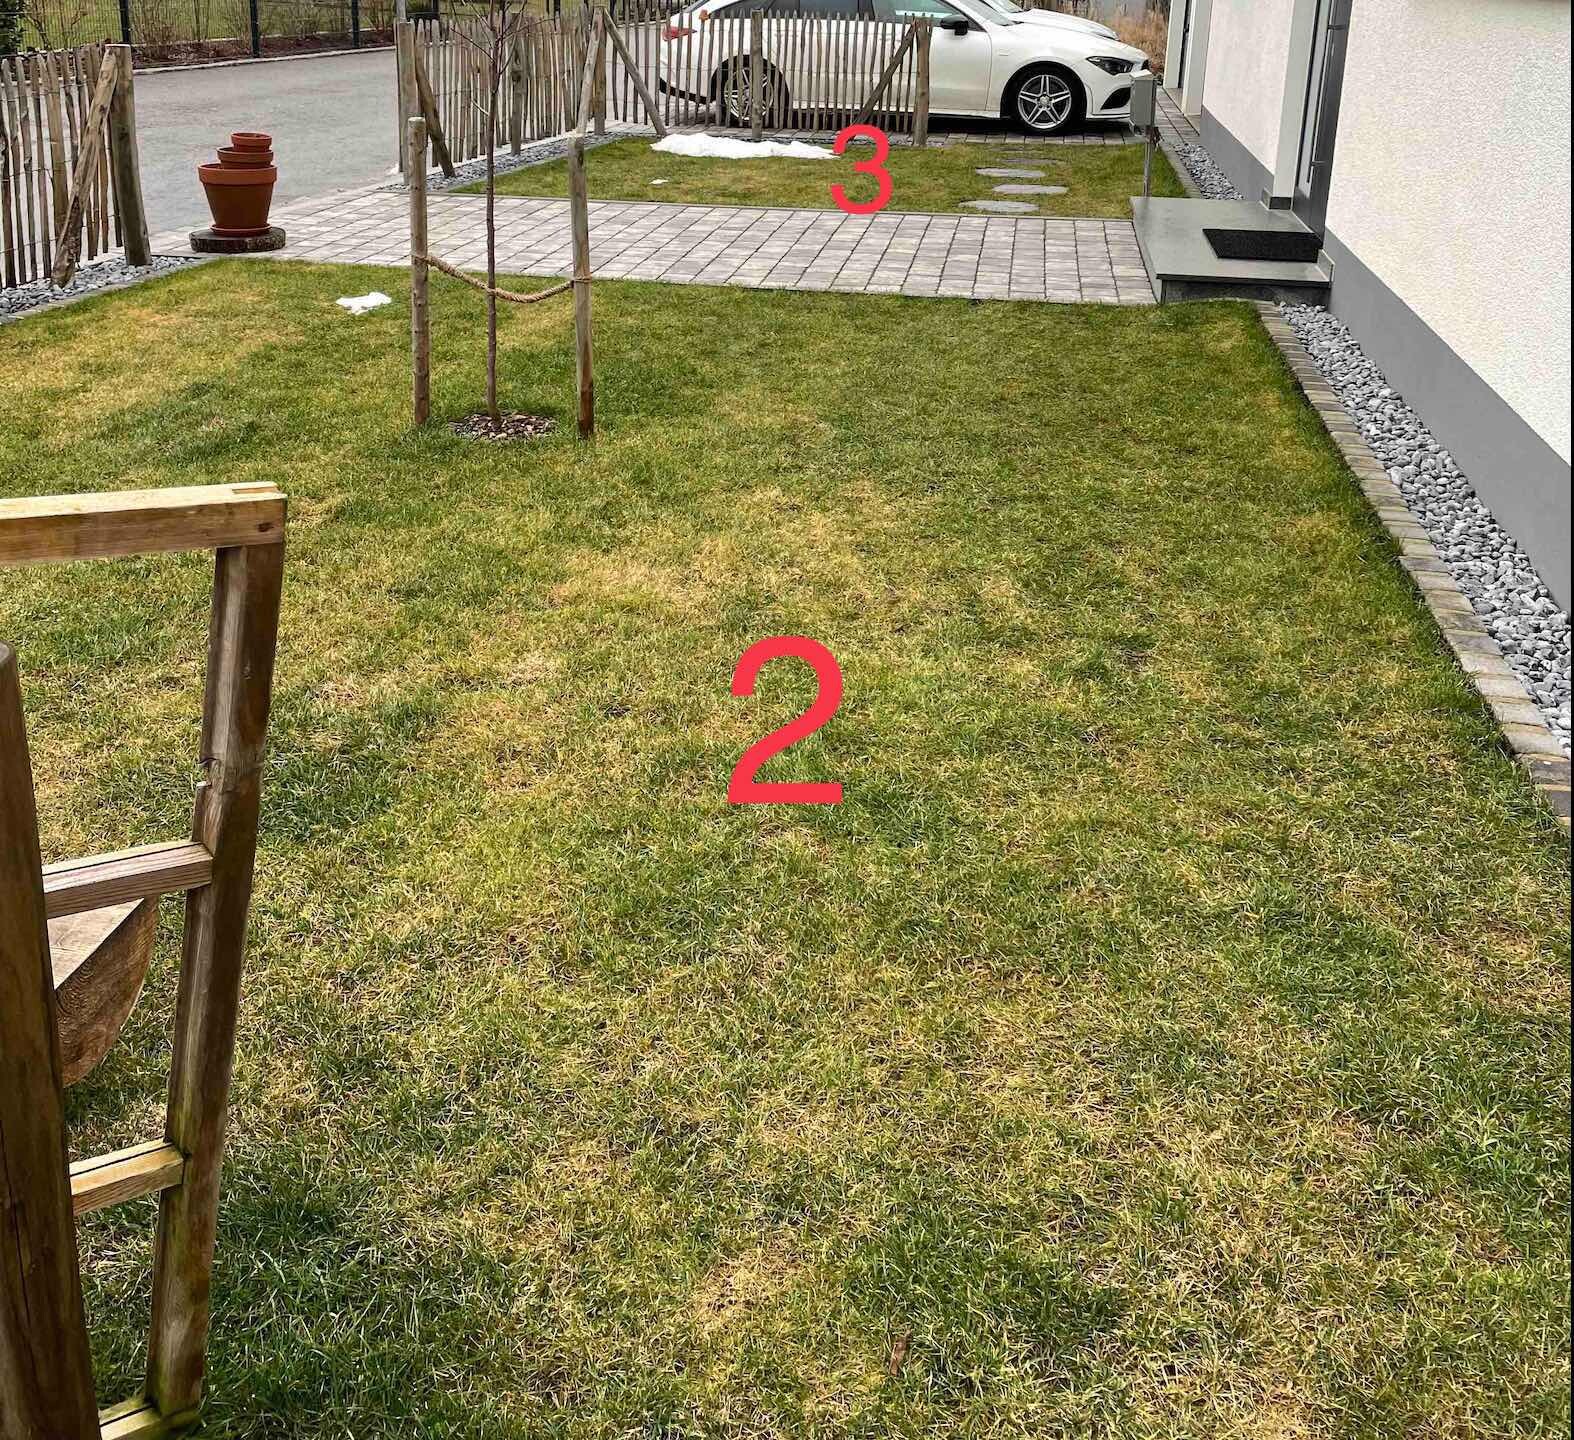
7. Mowing area "2" and "3"
8. Transition mowing area "2" and "3". Here I would lay the boundary wire in the joints. Is this transition even feasible for the mowing robot?
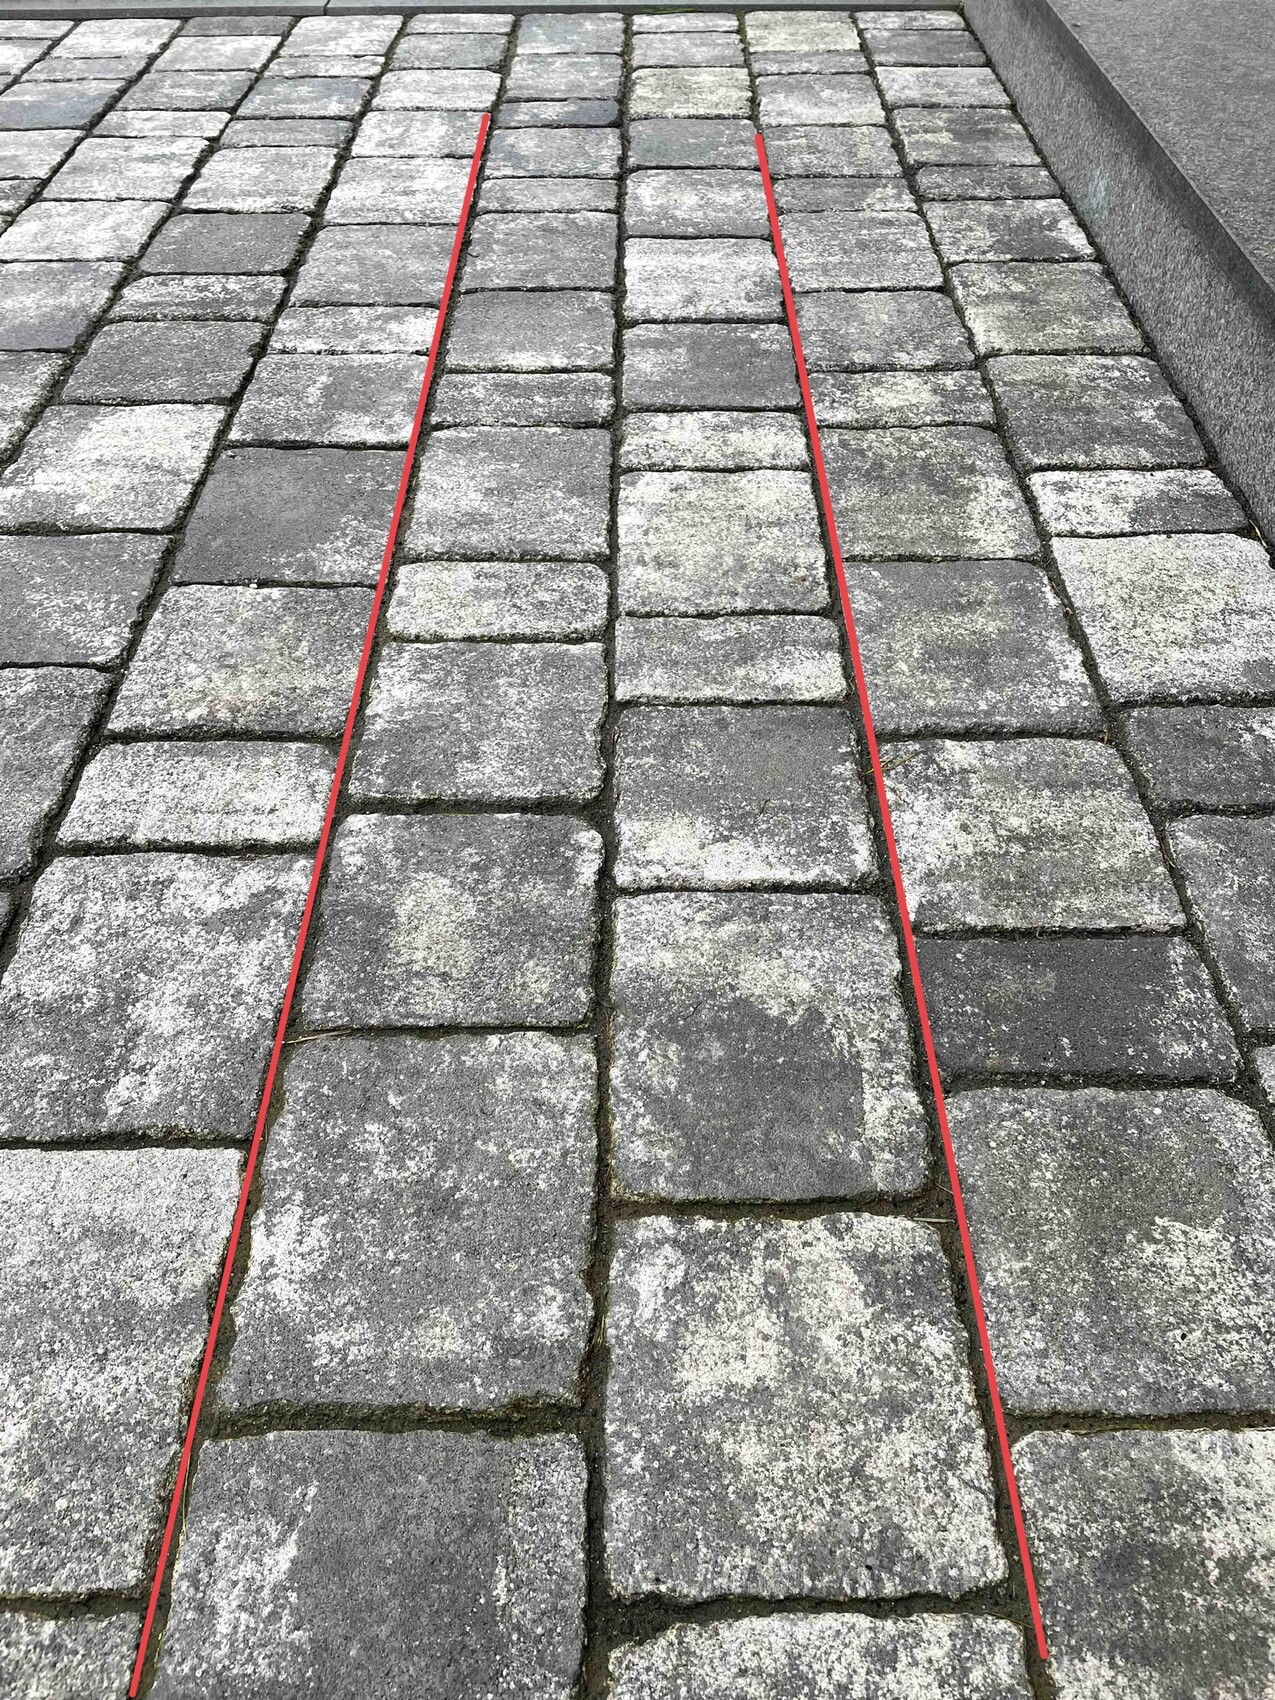
9. Detailed view joints. I might work on the joints a bit more with the angle grinder so that the wire fits inside. What width for the passage is recommended here?

So, I hope I was able to give you a rough overview of the area to be mowed and I am already looking forward to your opinions/suggestions.

Greetings & have a nice (rest of the) weekend Jörg


Similar topics
23.07.2016Construction of the driveway with gravel, crushed stone, and paving18
13.07.2022Paving paths - joints permeable to water / weed-free46
09.08.2018Buying Guide for Lawn Mower Robots27
31.01.2018Clinker: Vertical joints without mortar - Is that okay?17
26.02.2019Parkett joints installed untidily? Defect or tolerance?30
14.03.2019Paving not even and firm - what helps?38
07.01.2020Spreading agent / spreading material for ice for permeable paving11
17.05.2020Interaction between lawn mowers and irrigation control13
29.05.2020Courtyard access, access paths paving or concreting28
29.06.2020Shower back panel experiences, quality, joints?13
02.12.2020Parquet laid continuously without joints26
09.08.2021The lawn mowing robot is on – which one do you use and what do you say about it?135
04.03.2021Exterior wall damp, mold, joints sandy12
19.01.2022Lawn mower robot - How to implement on multiple areas25
17.04.2023Mower robot commissioning - Laying the boundary cable / guide cable10
01.06.2023Absolutely unhappy with the new plaster, doesn't fit - please give tips26
10.08.2023Garage door height for new paving11
31.08.2023The joint alignment from wall to floor is not symmetrical, what to do?35
09.01.2024Is water seeping through the plaster?11

Oben