Maik Mohr
2019-02-27 01:06:59
- #1
Hello community,
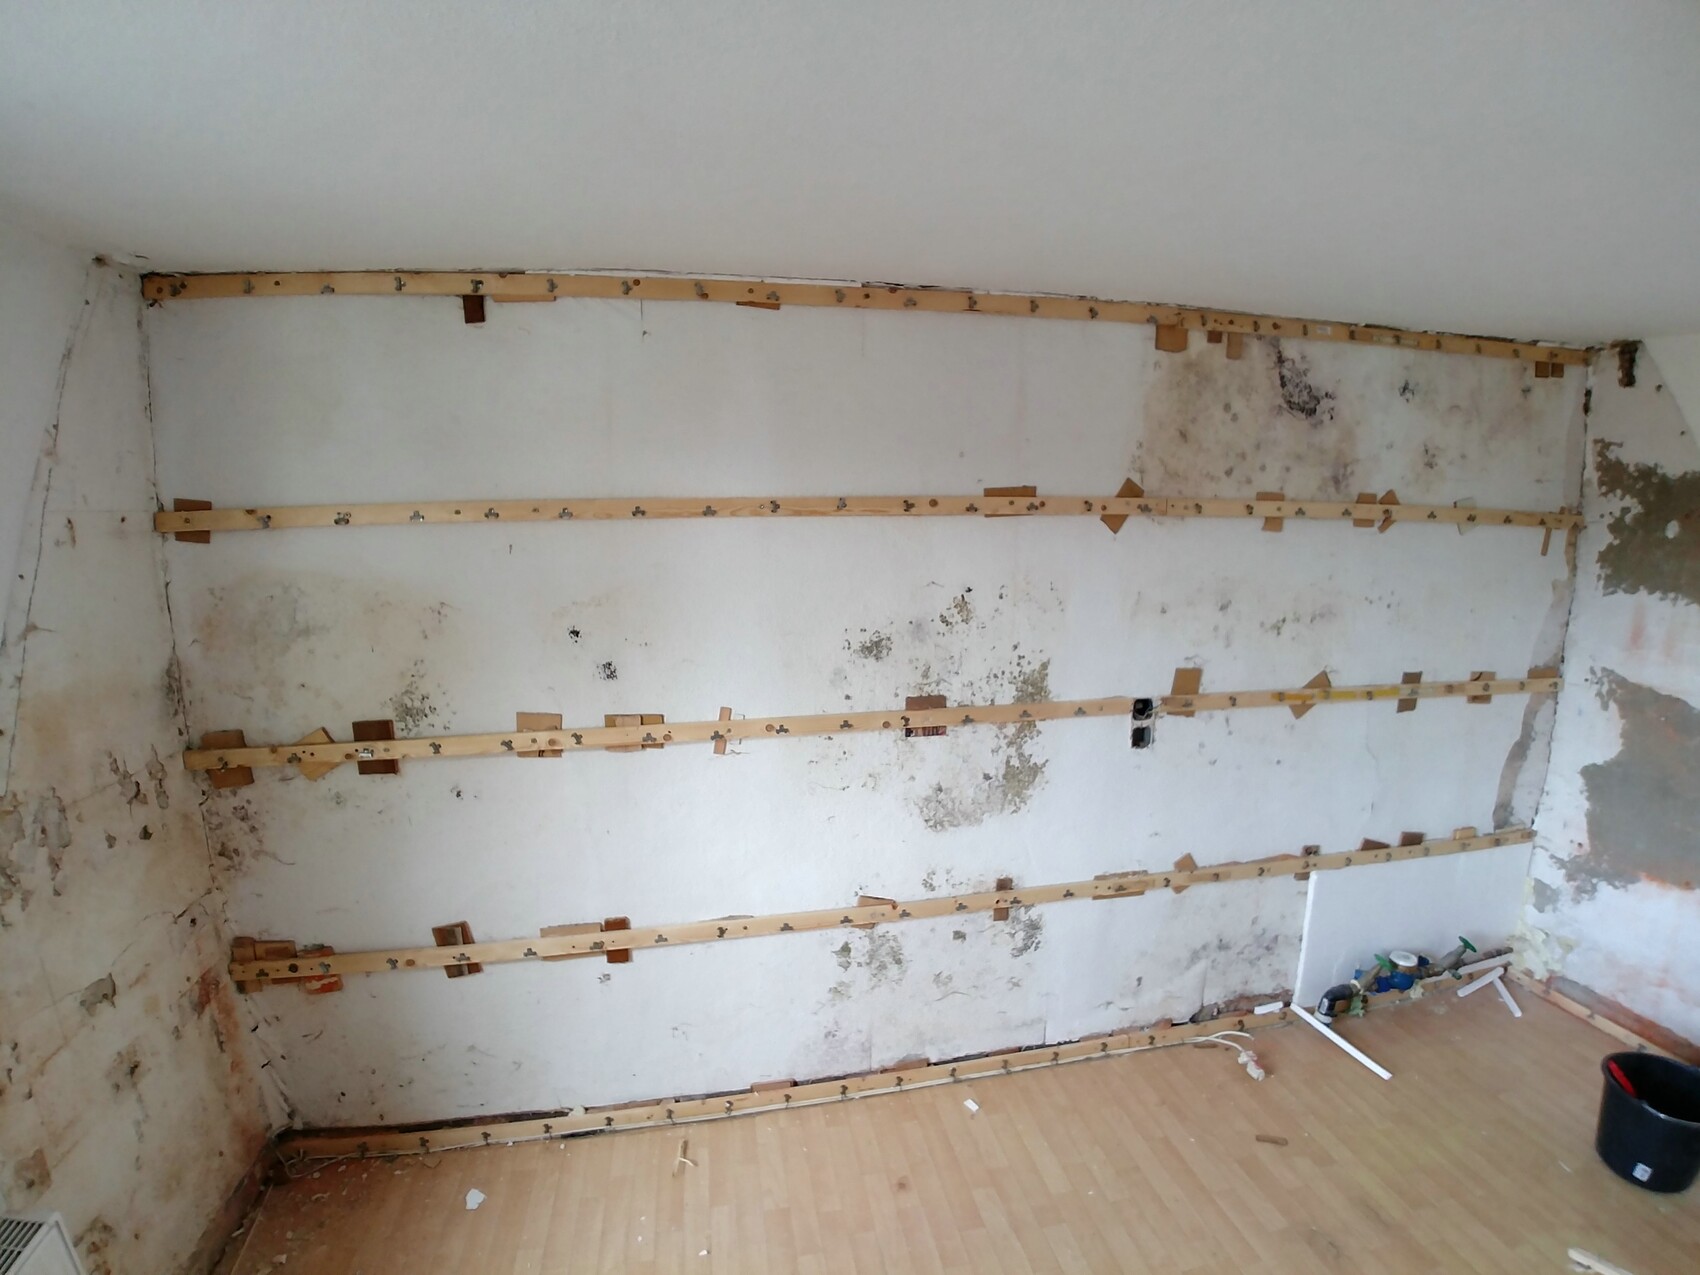
We recently bought a house, but unfortunately we now have to fix the botched work of the previous owner: In one room there was a musty smell, which was not noticeable before due to the commercial use portion. On the inside of the half-timbered exterior wall (weather and north side), panels were mounted, underneath them 20mm polystyrene boards with plenty of mold growth behind them.
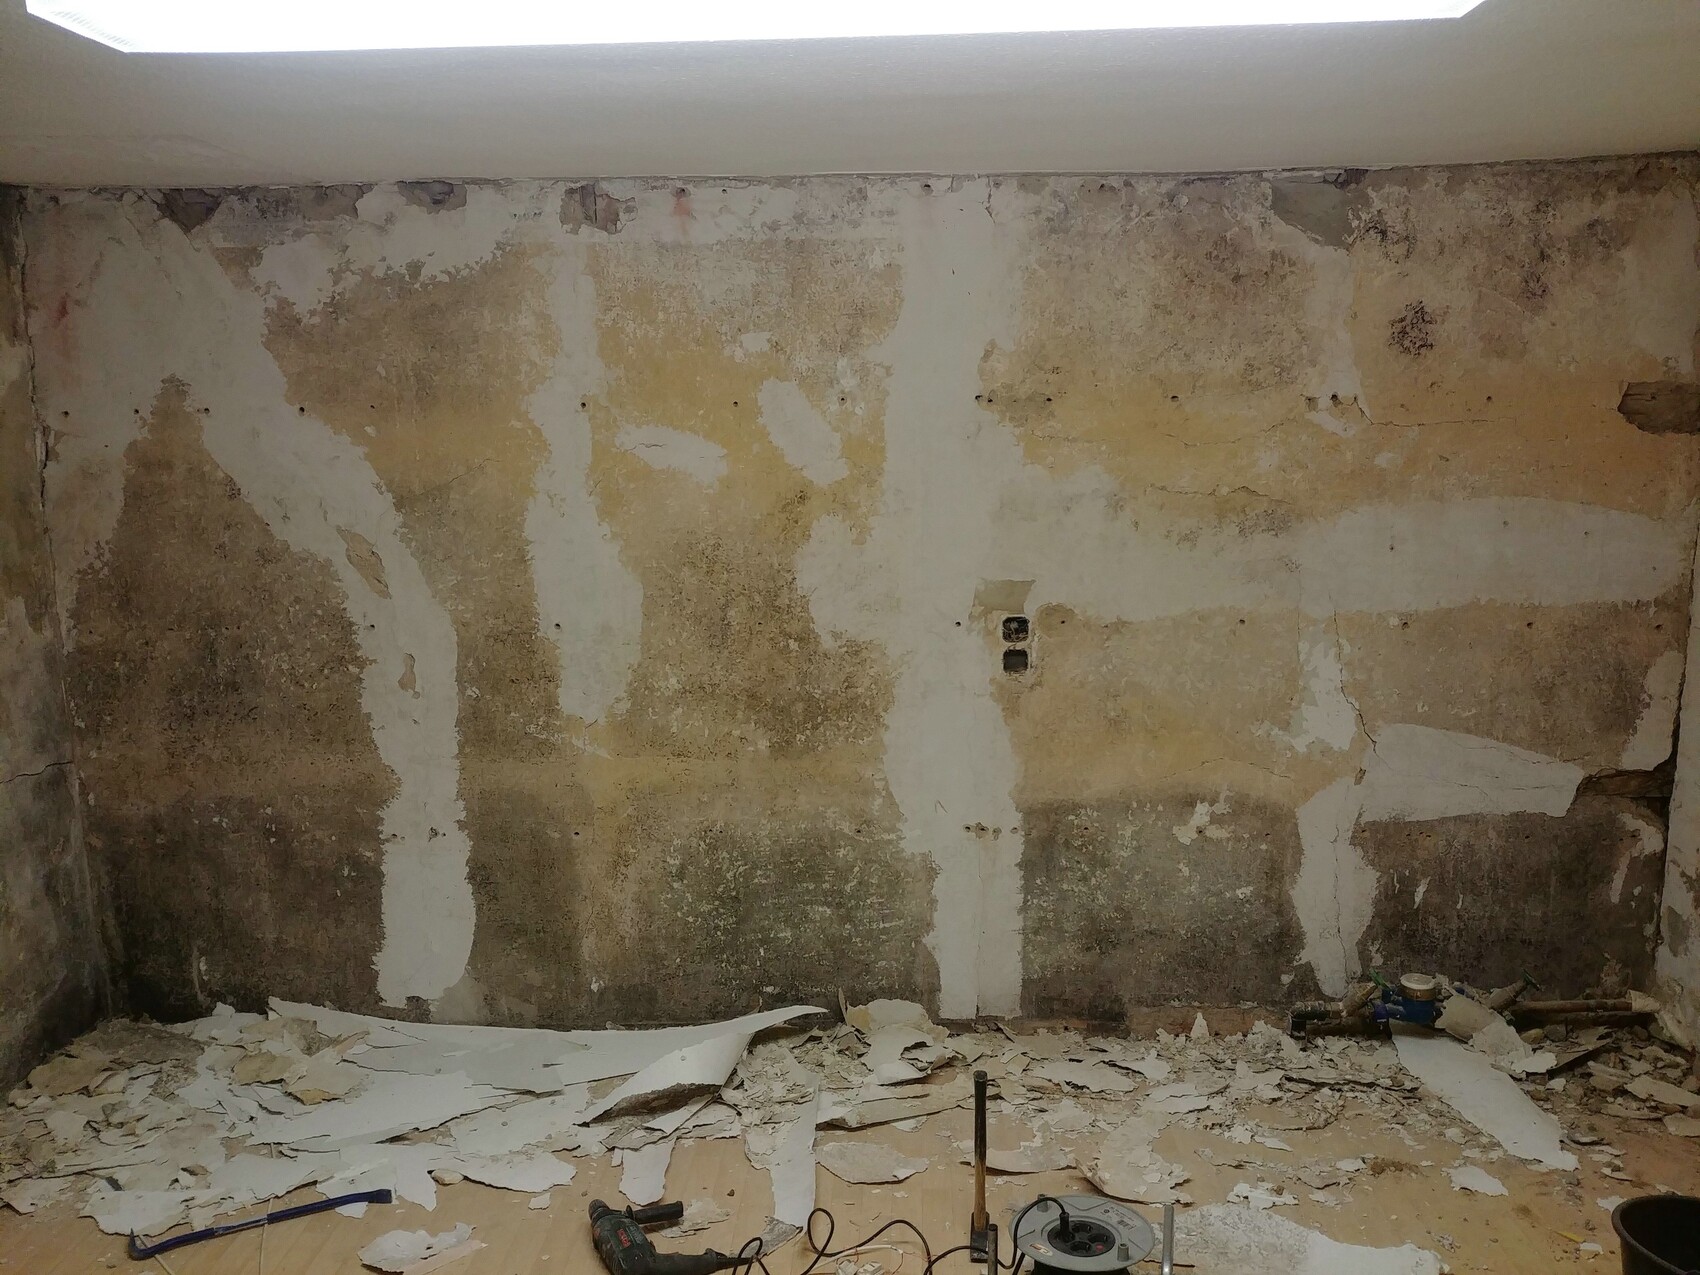
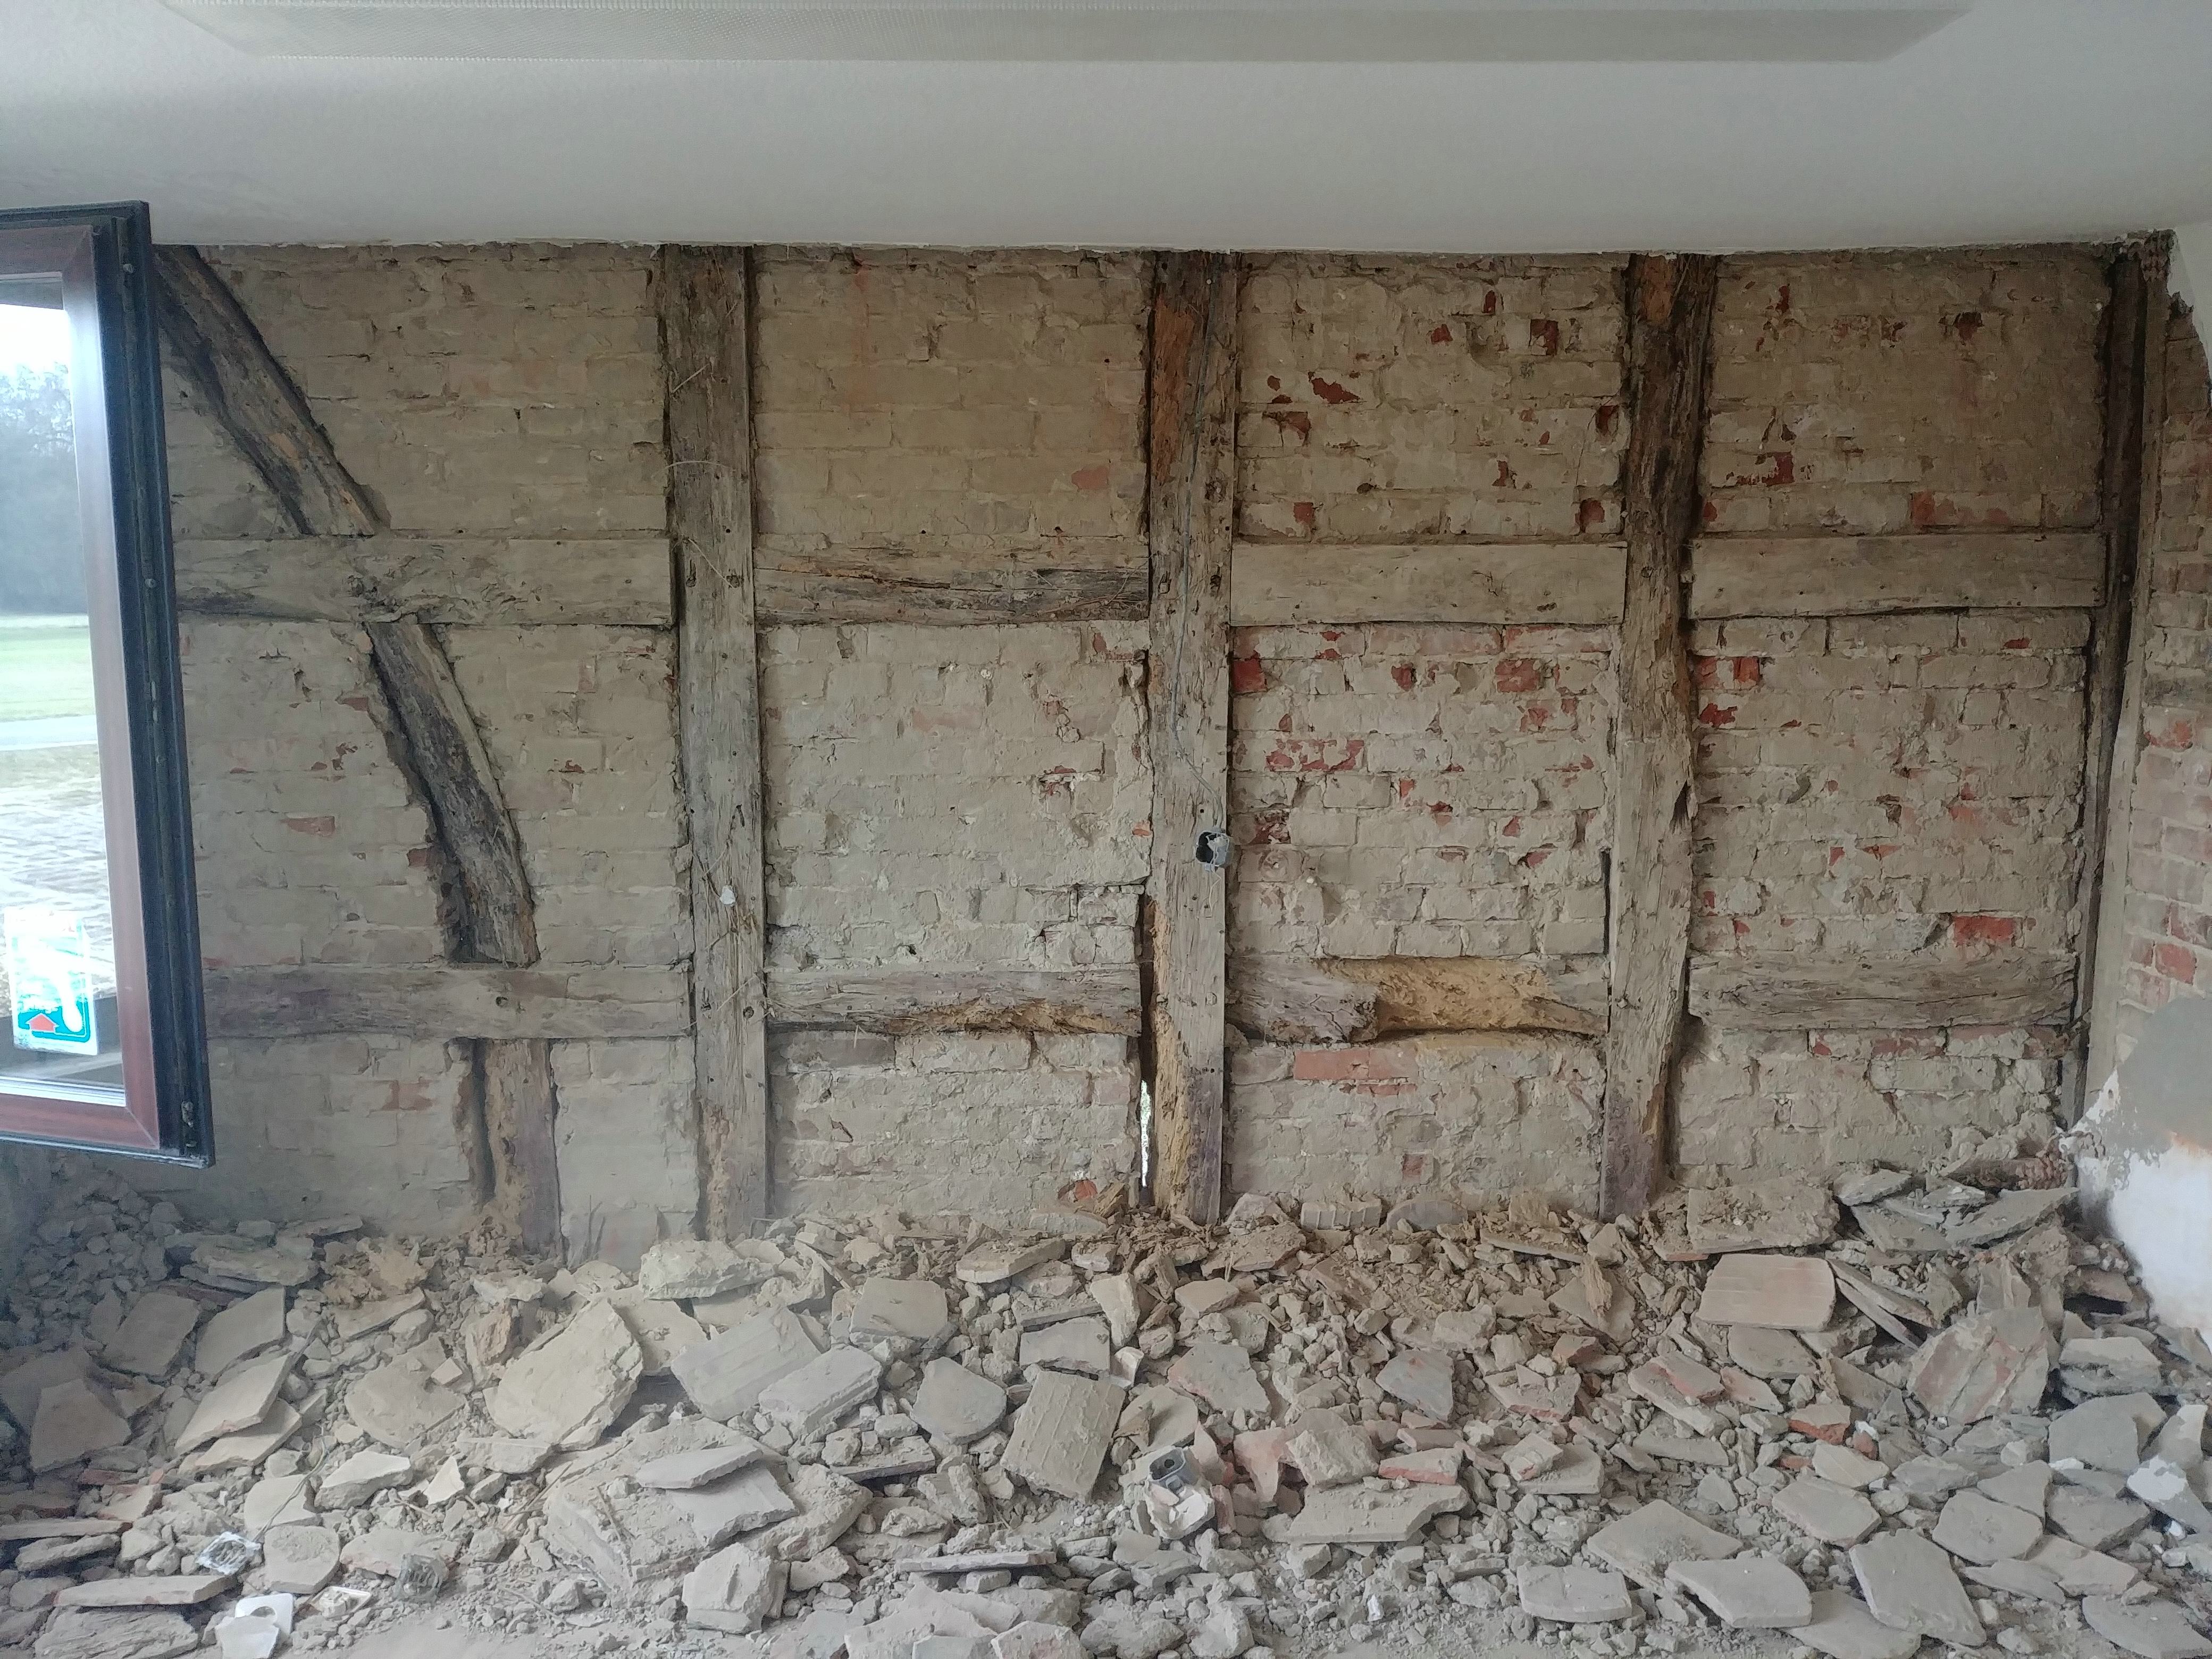
I then removed all the wallpaper and plaster – down to the masonry/half-timber. Unfortunately, the infill panels are not flush with the beams – they sit about 20-30mm deeper. Previously this was built up with mortar and beaver tail tiles placed in front, but I didn’t want to do it that way anymore, especially since I don’t have roof tiles I could use.
My idea now is to plaster the infill panels properly and then glue wood fiberboard onto the plaster. I would then either set these flush with the beam or about 10-15mm in front of the beams and bring the beams to a flush height with straw and clay plaster. Finally, from the outside, screw on a layer of 20-30mm wood fiberboard, primarily to close gaps and provide basic insulation. Above that then a clay or lime plaster.
What do you think? Can you do it this way since it is diffusion-open or would that be a no-go? If the idea is rubbish – please suggest something. Unfortunately, I am very far from this field and this measure was not planned in the budget. I also didn’t want to fully line the infill panels with clay mortar – that would probably take weeks to dry completely.
Regarding the pictures: The beams are also badly gnawed, but stable in the core (good oak). The worm gnawed itself on the damp side. But it will be repaired.
Best regards – Maik
We recently bought a house, but unfortunately we now have to fix the botched work of the previous owner: In one room there was a musty smell, which was not noticeable before due to the commercial use portion. On the inside of the half-timbered exterior wall (weather and north side), panels were mounted, underneath them 20mm polystyrene boards with plenty of mold growth behind them.
I then removed all the wallpaper and plaster – down to the masonry/half-timber. Unfortunately, the infill panels are not flush with the beams – they sit about 20-30mm deeper. Previously this was built up with mortar and beaver tail tiles placed in front, but I didn’t want to do it that way anymore, especially since I don’t have roof tiles I could use.
My idea now is to plaster the infill panels properly and then glue wood fiberboard onto the plaster. I would then either set these flush with the beam or about 10-15mm in front of the beams and bring the beams to a flush height with straw and clay plaster. Finally, from the outside, screw on a layer of 20-30mm wood fiberboard, primarily to close gaps and provide basic insulation. Above that then a clay or lime plaster.
What do you think? Can you do it this way since it is diffusion-open or would that be a no-go? If the idea is rubbish – please suggest something. Unfortunately, I am very far from this field and this measure was not planned in the budget. I also didn’t want to fully line the infill panels with clay mortar – that would probably take weeks to dry completely.
Regarding the pictures: The beams are also badly gnawed, but stable in the core (good oak). The worm gnawed itself on the damp side. But it will be repaired.
Best regards – Maik