DeepRed
2025-10-07 15:33:40
- #1
Hello everyone,
I have put into practice the idea of cladding my concrete block wall with facade wood. I wanted to show you the result here as inspiration. Maybe one or the other still needs an idea.
Key data:
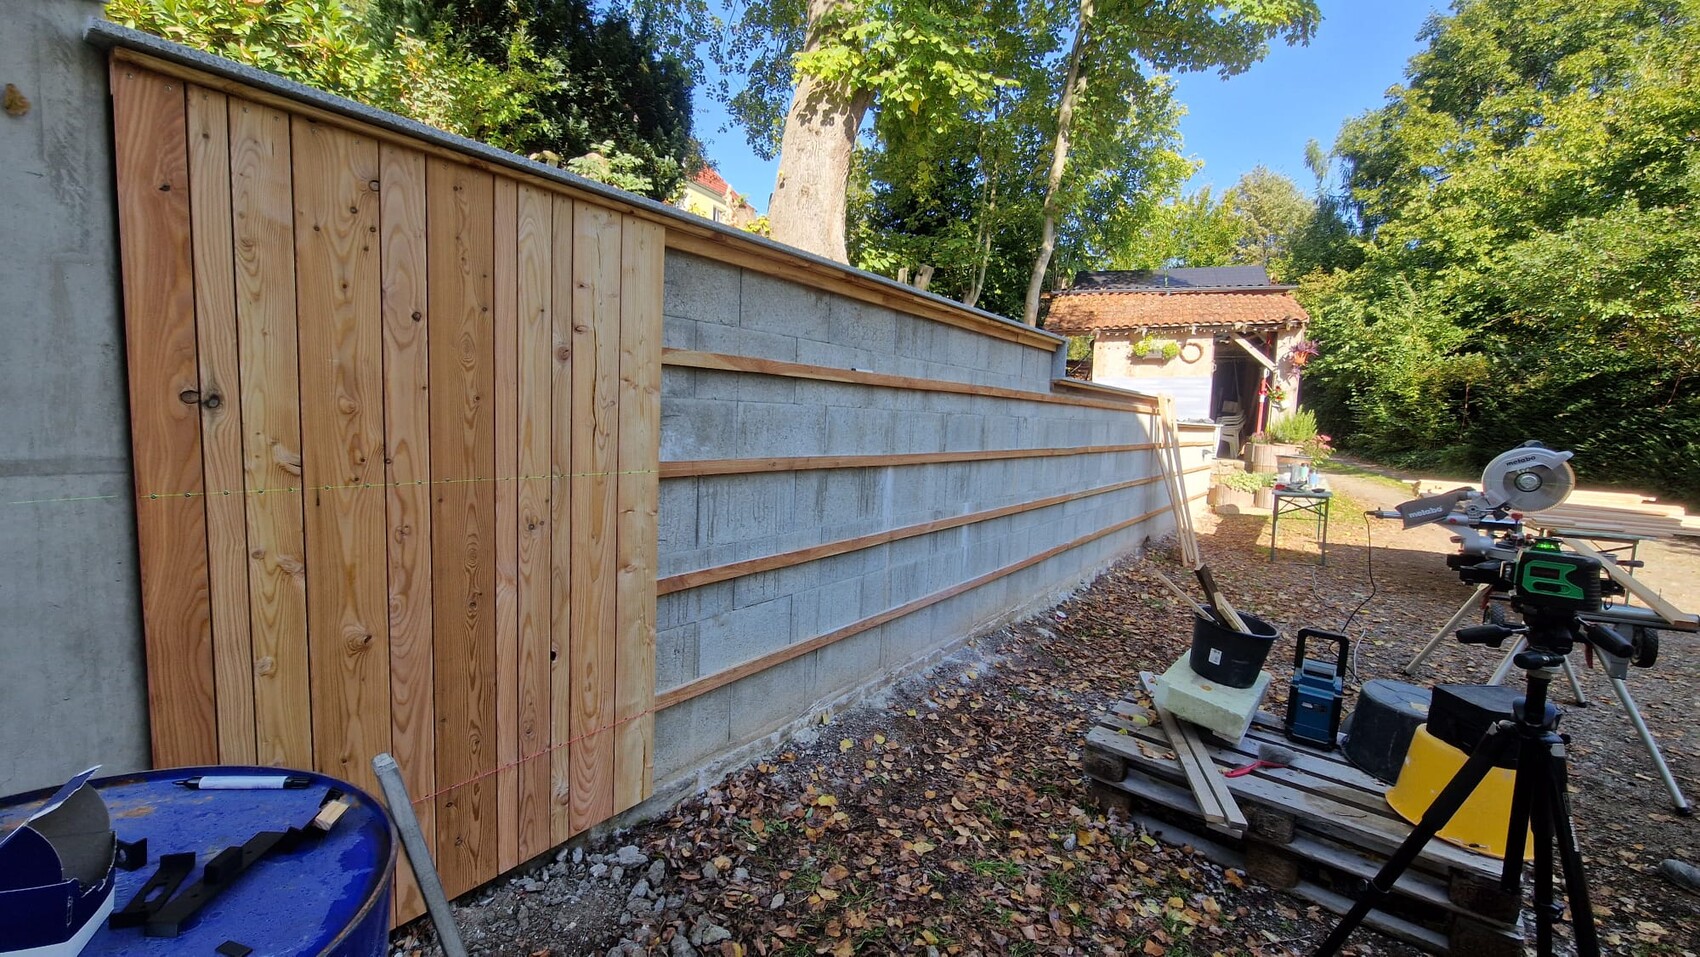
The wall (concrete block wall) was built for aesthetic reasons because we didn’t really like the slope behind it and this way we could create a little more space.
Length almost 13 meters, the height steps down twice, starts at 1.80m, then 1.65m and 1.40m. For the capping, 2cm thick, polished granite slabs were used, kept in the same look as our exterior window sills. The slabs protrude 7cm in front and back and each have a milled drip groove. Wood was planned as facade cladding anyway, but how? Which pattern or style do we choose?
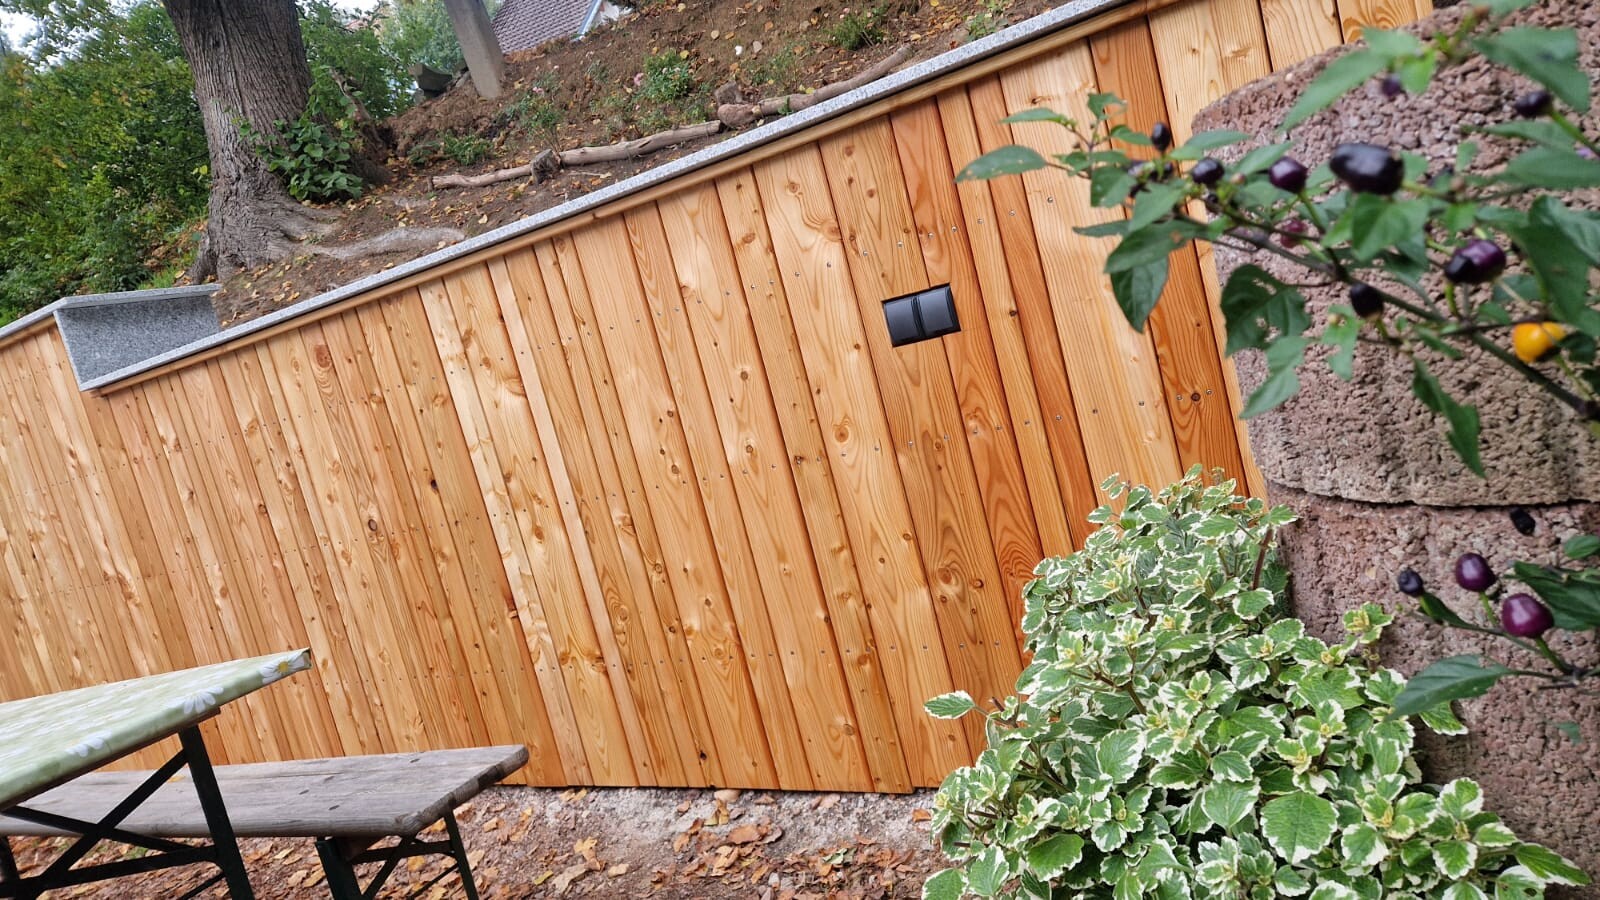
On vacation in 2024 (Austria), I then saw a house facade last year that was constructed with boards of different widths. I had never seen it like that before and was immediately impressed.
In preparation, I had made 3 templates using a 3D printer to set the drill holes on each board at the same distance, so that the appearance remains clean there as well and the stainless steel heads of the facade screws are nice and even.
I had conveniently set the widths of the boards to 145mm, 90mm, and 52mm. That way, we could use the standard larch wood board (145mm wide) once as a whole and also as a 1/3 to 2/3 divider (3mm missing due to the saw blade width during the longitudinal cut). A friend of mine had the corresponding machines in his garage to cut the standard boards to length, split them, and chamfer them.
After installation, everything was still painted with linseed oil varnish. The upper substructure (Unterkonstruktion) is laid in an L shape under the granite capping. A 10mm groove was milled into the L and an LED strip was embedded in silicone. So now the cat has a lit path from the carport to the house ;)
A short note about the pattern: I searched a long time on the internet but didn’t really find anything suitable. Then I took the vacation photo from Austria and wrote down the sequence in which the boards were arranged. The pattern repeated after 34 boards. Otherwise, you can actually attach them randomly. Only no more than 4 boards of the same width may follow each other.
The costs for the wood (including substructure) amount to €750, screws (all stainless steel) to just under €90. The LED strip cost €15. The machines (except for those in my friend’s garage) were already in our possession due to the house construction. We needed about 3 full days for the described work.
You can see the result in the attachment.
I have put into practice the idea of cladding my concrete block wall with facade wood. I wanted to show you the result here as inspiration. Maybe one or the other still needs an idea.
Key data:
The wall (concrete block wall) was built for aesthetic reasons because we didn’t really like the slope behind it and this way we could create a little more space.
Length almost 13 meters, the height steps down twice, starts at 1.80m, then 1.65m and 1.40m. For the capping, 2cm thick, polished granite slabs were used, kept in the same look as our exterior window sills. The slabs protrude 7cm in front and back and each have a milled drip groove. Wood was planned as facade cladding anyway, but how? Which pattern or style do we choose?
On vacation in 2024 (Austria), I then saw a house facade last year that was constructed with boards of different widths. I had never seen it like that before and was immediately impressed.
In preparation, I had made 3 templates using a 3D printer to set the drill holes on each board at the same distance, so that the appearance remains clean there as well and the stainless steel heads of the facade screws are nice and even.
I had conveniently set the widths of the boards to 145mm, 90mm, and 52mm. That way, we could use the standard larch wood board (145mm wide) once as a whole and also as a 1/3 to 2/3 divider (3mm missing due to the saw blade width during the longitudinal cut). A friend of mine had the corresponding machines in his garage to cut the standard boards to length, split them, and chamfer them.
After installation, everything was still painted with linseed oil varnish. The upper substructure (Unterkonstruktion) is laid in an L shape under the granite capping. A 10mm groove was milled into the L and an LED strip was embedded in silicone. So now the cat has a lit path from the carport to the house ;)
A short note about the pattern: I searched a long time on the internet but didn’t really find anything suitable. Then I took the vacation photo from Austria and wrote down the sequence in which the boards were arranged. The pattern repeated after 34 boards. Otherwise, you can actually attach them randomly. Only no more than 4 boards of the same width may follow each other.
The costs for the wood (including substructure) amount to €750, screws (all stainless steel) to just under €90. The LED strip cost €15. The machines (except for those in my friend’s garage) were already in our possession due to the house construction. We needed about 3 full days for the described work.
You can see the result in the attachment.