elsausb
2021-10-04 15:49:17
- #1
Hello dear forum members,
we are looking for another perspective on our problems, which we have already addressed with the roofer. Specifically, it concerns a flat roof on the garage as well as the flat roof on our roof terrace, which, according to our analysis, was installed incorrectly.
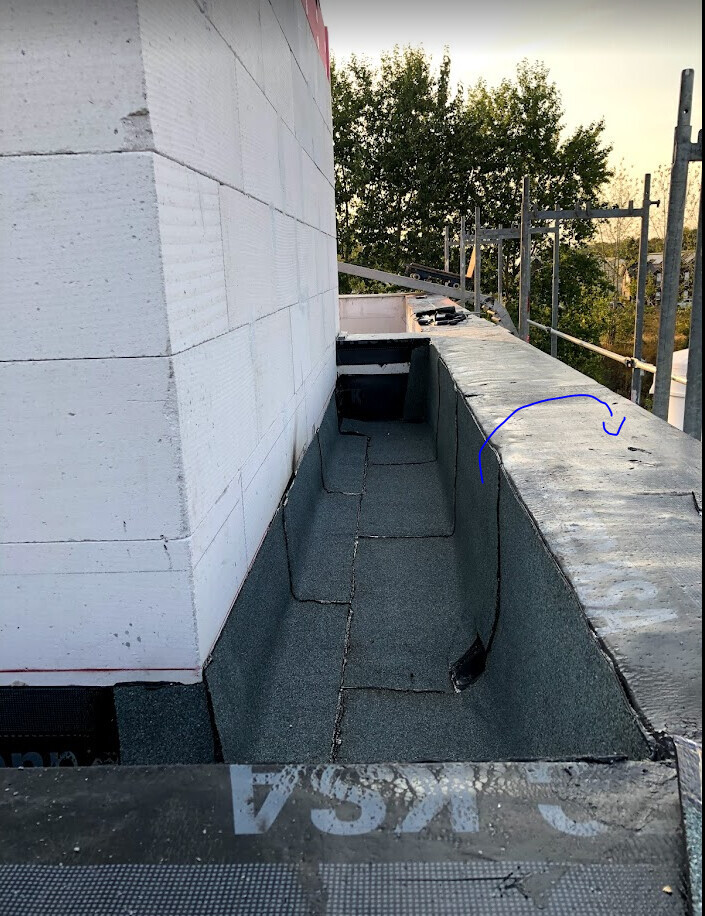
1. Installation of roofing membranes
As can be seen in the two pictures below, the manufacturer's instructions were not followed correctly. On the one hand, the underlayer was pulled up directly at the wall and on the other hand, it was not doubled at the connections. According to the example sketch, 4 layers should be stacked in the corner, whereas we have only 2. Furthermore, the underlayer is not as high as the upper layer, which means only the underlayer is secured against slipping by the later cover strip. Also, no ice wedge was installed.
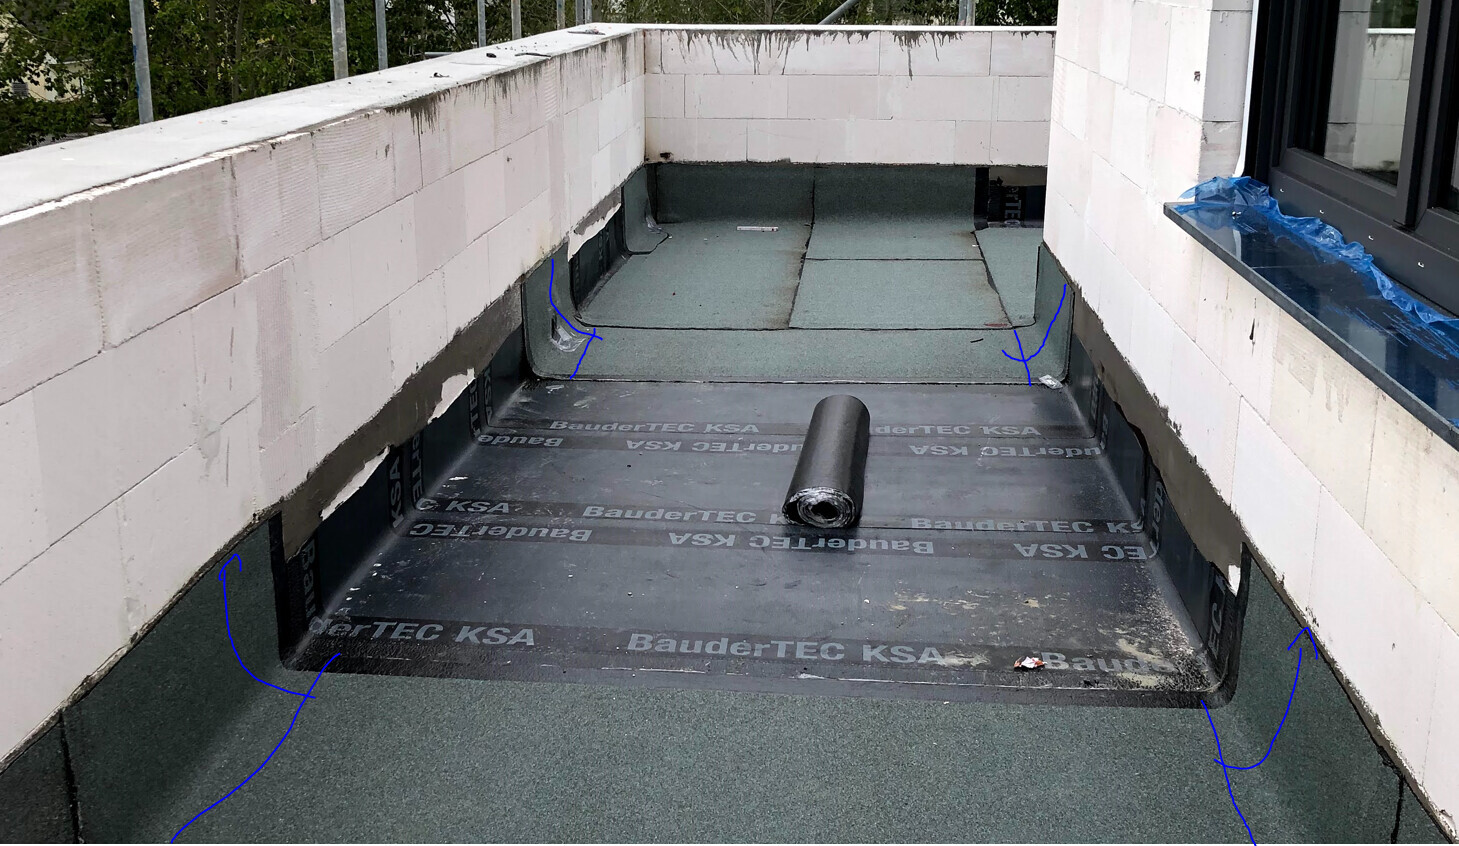

2. Connections at the parapet
The same problem exists with the connections at the parapet. In addition, the upper layer was only laid to the end of the parapet and not, as shown in the sketch, extended up to the outer edge. In our opinion, driving rain or snow drift could allow water to get under the metal cover and sooner or later also through the seams.

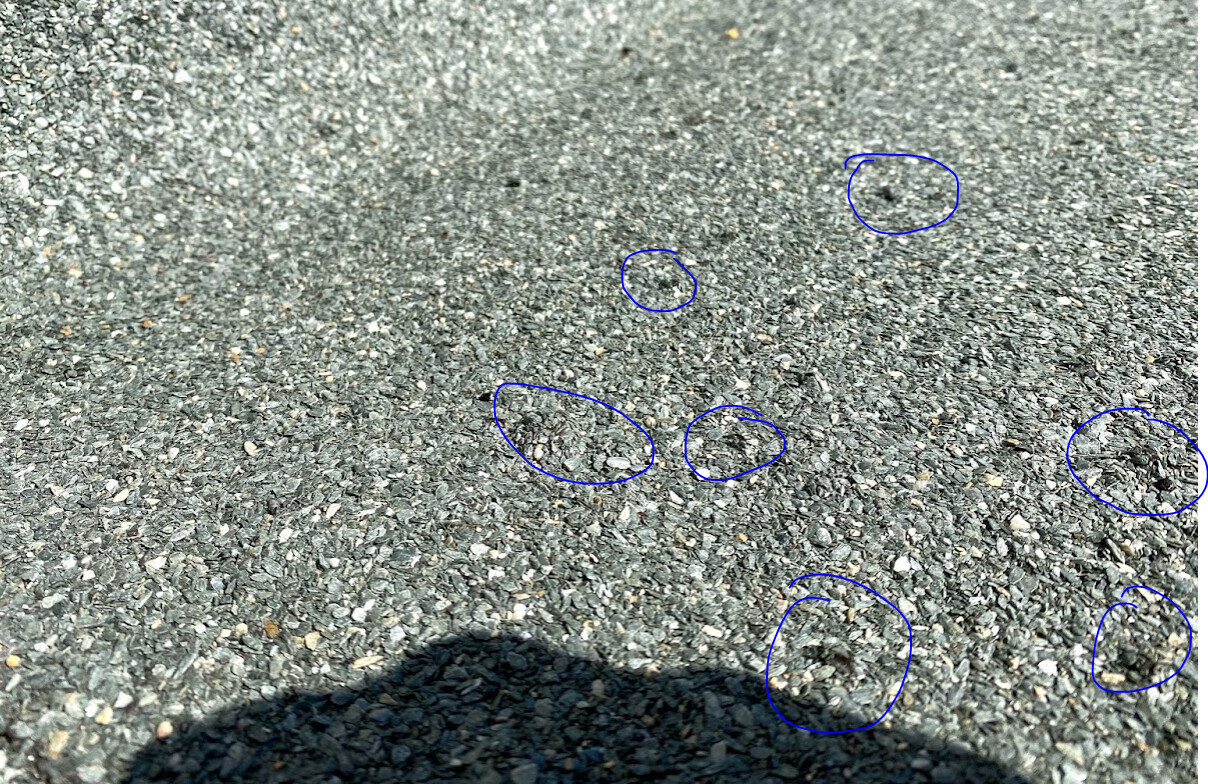
3. Blistering on bitumen membranes
It is also observed that blistering is slowly forming on the membranes that receive a lot of sun. We were told that there were some production defects which can lead to such formation. Our suspicion is rather that moisture has already accumulated in the underlying insulation, which then tries to diffuse outward when exposed to sunlight. Has anyone had similar experiences? Upon spot opening of the cover, residual moisture was definitely found, which however dried out after a short standing time.

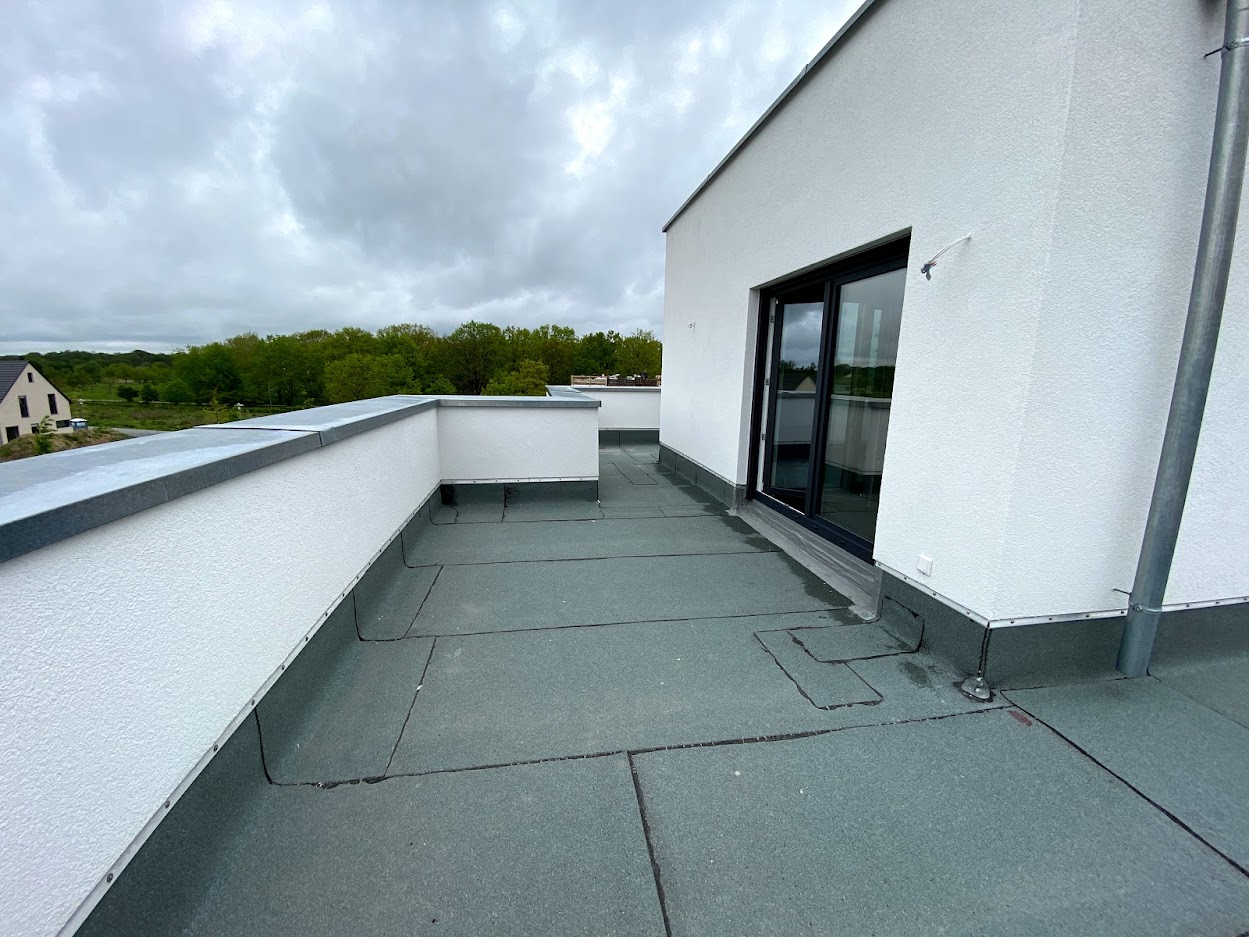
4. Cover strip
Furthermore, the photos below show that the masonry is exposed in places and not completely covered by the cover strip. This is probably due to my first point, as the membranes were not installed in two parts. Instead, the entire membrane was pulled from left to right on a whim. Also, it is not quite clear to me how the current setup prevents water from the plaster from getting behind the cover strip. According to the sketch, the cover strip should be recessed in the masonry to prevent water running behind.


4. Proposed solution from the roofer
As a solution, the roofer offered to lay another membrane over the existing ones so that the material defect from point 3 would be compensated and the other defects covered. From our point of view, this is a huge cheek, since, in our view, the defects would still exist and would only be covered by another layer. What do you think about this? Does that make sense or should we insist on having the whole roof redone?
By the way, this is what it looks like today. You can see at the connection where a test was opened.
Thank you very much for your help!

we are looking for another perspective on our problems, which we have already addressed with the roofer. Specifically, it concerns a flat roof on the garage as well as the flat roof on our roof terrace, which, according to our analysis, was installed incorrectly.
1. Installation of roofing membranes
As can be seen in the two pictures below, the manufacturer's instructions were not followed correctly. On the one hand, the underlayer was pulled up directly at the wall and on the other hand, it was not doubled at the connections. According to the example sketch, 4 layers should be stacked in the corner, whereas we have only 2. Furthermore, the underlayer is not as high as the upper layer, which means only the underlayer is secured against slipping by the later cover strip. Also, no ice wedge was installed.
2. Connections at the parapet
The same problem exists with the connections at the parapet. In addition, the upper layer was only laid to the end of the parapet and not, as shown in the sketch, extended up to the outer edge. In our opinion, driving rain or snow drift could allow water to get under the metal cover and sooner or later also through the seams.
3. Blistering on bitumen membranes
It is also observed that blistering is slowly forming on the membranes that receive a lot of sun. We were told that there were some production defects which can lead to such formation. Our suspicion is rather that moisture has already accumulated in the underlying insulation, which then tries to diffuse outward when exposed to sunlight. Has anyone had similar experiences? Upon spot opening of the cover, residual moisture was definitely found, which however dried out after a short standing time.
4. Cover strip
Furthermore, the photos below show that the masonry is exposed in places and not completely covered by the cover strip. This is probably due to my first point, as the membranes were not installed in two parts. Instead, the entire membrane was pulled from left to right on a whim. Also, it is not quite clear to me how the current setup prevents water from the plaster from getting behind the cover strip. According to the sketch, the cover strip should be recessed in the masonry to prevent water running behind.
4. Proposed solution from the roofer
As a solution, the roofer offered to lay another membrane over the existing ones so that the material defect from point 3 would be compensated and the other defects covered. From our point of view, this is a huge cheek, since, in our view, the defects would still exist and would only be covered by another layer. What do you think about this? Does that make sense or should we insist on having the whole roof redone?
By the way, this is what it looks like today. You can see at the connection where a test was opened.
Thank you very much for your help!